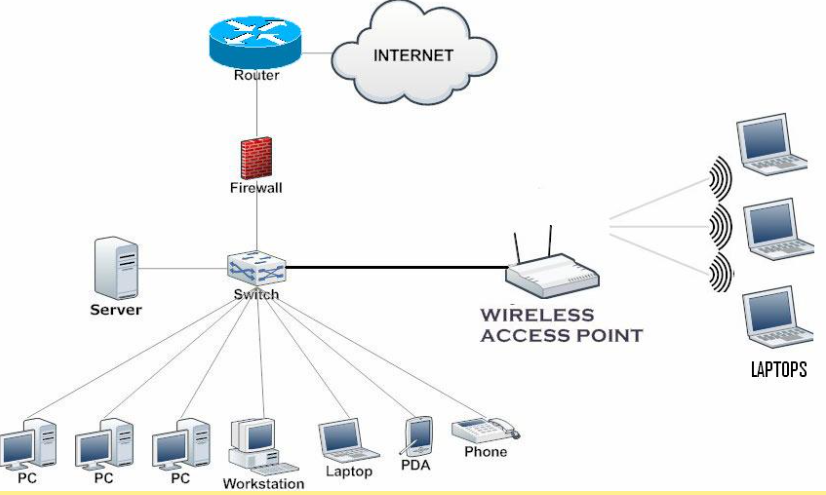
Small Office/Home Office (SOHO) networks are essential for businesses and individuals who require internet connectivity and file sharing in their homes or small offices. Installing a SOHO network is a relatively straightforward process that requires a few basic steps. In this blog post, we’ll guide you through the process of installing a SOHO network.
Step 1: Identify Your Network Requirements Before installing your SOHO network, you must first identify your network requirements. Consider the number of devices you want to connect to your network, the types of files you’ll be sharing, and the level of security you need. Understanding your network requirements will help you choose the appropriate equipment for your network.
Step 2: Choose a Router A router is a necessary component of a SOHO network as it serves as the central hub that connects all the devices on your network to the internet. When selecting a router, consider the number of ports available, the type of connections supported (Wi-Fi, Ethernet), and the level of security it offers. Choose a router that can accommodate your network requirements, such as the number of devices that need to connect to the internet.
Step 3: Connect Your Router Once you have selected your router, connect it to your modem using an Ethernet cable. This will allow your router to connect to the internet. If your modem has a built-in router, you can skip this step.
Step 4: Configure Your Router Next, you will need to configure your router. This involves accessing your router’s settings and configuring it to suit your network requirements. To access your router’s settings, connect a computer to the router using an Ethernet cable or connect to the router wirelessly using a Wi-Fi connection. Then, open a web browser and type in the router’s IP address. This will take you to the router’s settings page where you can configure your router’s network settings, such as the SSID (network name) and password.
Step 5: Connect Your Devices Once you have configured your router, you can connect your devices to the network. To do this, ensure that your devices are Wi-Fi enabled and within range of your router’s signal. Your devices will detect the router’s network name and password, and you can use this information to connect to the network.
Step 6: Enable File Sharing If you want to share files between devices on your network, you will need to enable file sharing. To do this, you will need to create a shared folder on your computer and allow other devices on your network to access it. To create a shared folder on your computer, right-click on the folder you want to share, select “Properties,” and then click on the “Sharing” tab. From there, you can choose to share the folder with specific users or everyone on your network.
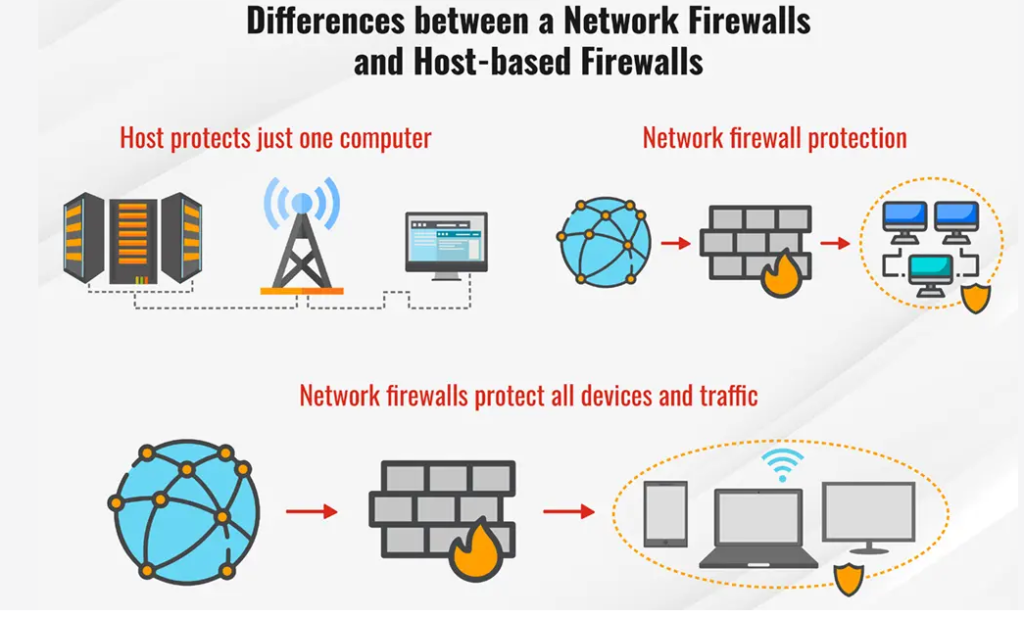
Step 7: Set up Security Finally, it’s essential to set up security to protect your SOHO network from unauthorized access. Ensure that your router has a strong password and that all devices on your network are protected by antivirus software. You can also enable features such as a firewall to add an extra layer of protection to your network.
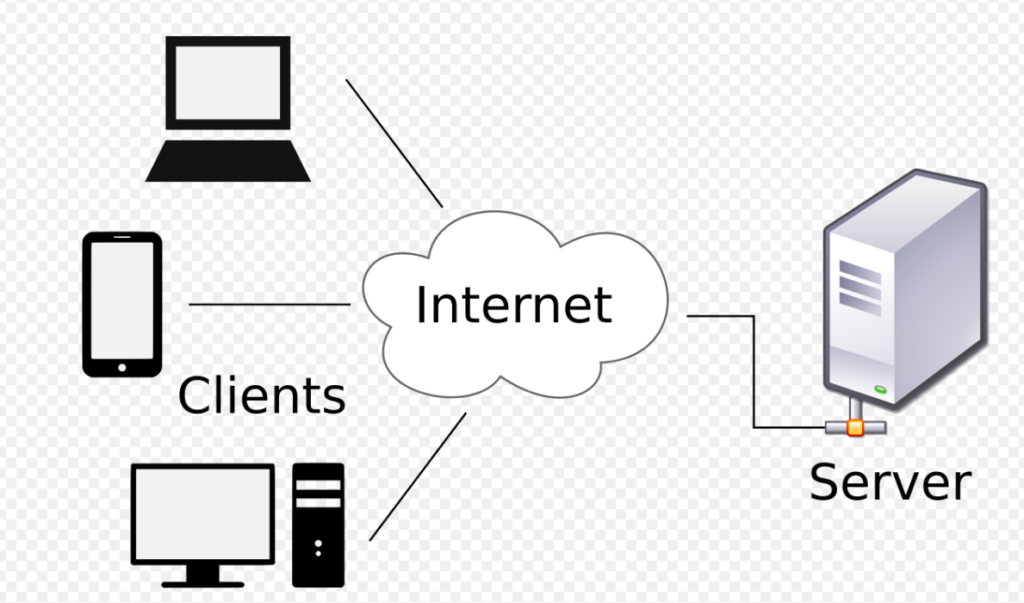
Server setup:
- Choose the Right Hardware The first step is to choose the right hardware for your server. While you can use an existing PC, it’s best to use a dedicated machine with a fast processor, plenty of RAM, and ample storage. You’ll also need to ensure that the PC has an Ethernet port to connect to your network.
- Install the Operating System Once you have your hardware, you’ll need to install an operating system on your PC. Windows Server is the most popular choice, but you can also use a Linux distribution such as Ubuntu Server. Make sure to choose an operating system that’s compatible with your hardware.
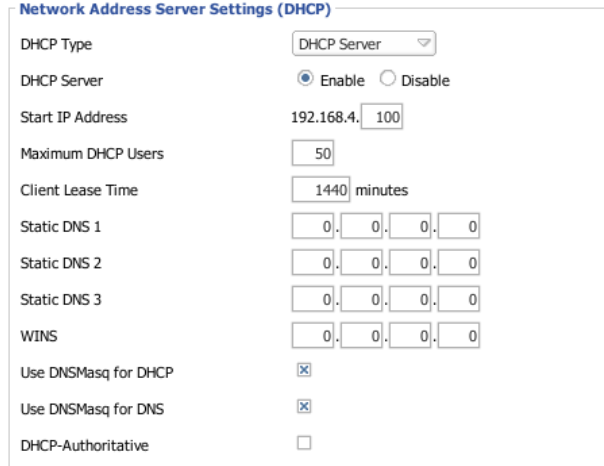
- Configure the Server After installing the operating system, you’ll need to configure the server. This includes setting up a static IP address, enabling remote desktop access, and configuring network settings such as DNS and DHCP. You’ll also need to install any necessary software such as a file-sharing program or a web server.
- Set Up Shared Folders One of the primary purposes of a server is to share files across a network. To set up shared folders, you’ll need to create a folder on your server and configure the appropriate permissions. You can set permissions for individual users or groups, allowing you to control who has access to specific files or folders.
- Configure Backups Another critical aspect of a server is backups. You can configure your server to automatically back up files and data, ensuring that you always have a copy in case of a system failure or accidental deletion. You can use built-in backup software or third-party applications to set up regular backups.
- Test the Server Once you’ve set up your server, it’s essential to test it to ensure that everything is working correctly. You can test file sharing, remote access, and other features to make sure that your server is functioning as intended.
Limitations:
Limited Scalability One of the main limitations of SOHO networks is limited scalability. These networks are designed to serve a small number of users, and as such, they may not be able to accommodate significant growth. If your business expands, you may need to upgrade your network infrastructure to a more robust solution.
Limited Bandwidth SOHO networks are also limited in terms of bandwidth. These networks typically have limited bandwidth due to the internet connection speed available to the premises. The amount of bandwidth available determines the maximum speed at which data can be transferred on the network, and this can be a significant limitation for businesses that need to transfer large files or use bandwidth-intensive applications.
Limited Security Features Another limitation of SOHO networks is limited security features. While most routers used in SOHO networks come with basic security features such as firewalls, they may not be enough to protect against advanced threats such as malware, phishing attacks, and other forms of cyberattacks. If your business handles sensitive data, you may need to invest in additional security solutions to protect your network.
Limited Support SOHO networks are typically designed for small businesses or home use, and as such, they may not have the same level of support as enterprise networks. If you experience technical issues with your network, you may need to rely on online resources or community support to resolve the issue, which can be time-consuming and frustrating.
Limited Features Finally, SOHO networks may have limited features compared to enterprise networks. For example, they may not support advanced features such as load balancing, VPNs, or multiple WAN connections. These limitations can impact the functionality of your network and may limit your ability to perform certain tasks.
In conclusion, installing a SOHO network is a simple process that requires a few basic steps. By identifying your network requirements, choosing the right equipment, and configuring your router and devices, you can set up a secure and reliable network in your home or small office.