Close Menu

    Subscribe to Updates

    Get the latest creative news from FooBar about art, design and business.

    What's Hot

    Windows 10 End of Service: What Must Be Done

    19 March 2025

    Elementor #7217

    5 March 2025

    Why Windows is Still the Best for Gamers: A Deep Dive

    27 February 2025
    Facebook X (Twitter) Instagram
    Facebook X (Twitter) Instagram Vimeo
    Let's Tech It Easy
    Subscribe Login
    • Homepage
    • About
    • Blog
      • Computers
      • Cloud
      • Gaming
      • Cyber Security
      • iPhone
      • Mac
      • Windows
      • Android
    • Contact
    • My Tickets
    • Submit Ticket
    Let's Tech It Easy
    Home»Computers»How to Setup New Printer
    Computers

    How to Setup New Printer

    neupanemadhavBy neupanemadhav4 September 2023Updated:13 September 2023No Comments3 Mins Read
    Facebook Twitter Pinterest LinkedIn Tumblr WhatsApp VKontakte Email
    Share
    Facebook Twitter LinkedIn Pinterest Email

    New printer ready to print out awesome creation.

    FIG: Brand New Printer

    Introduction

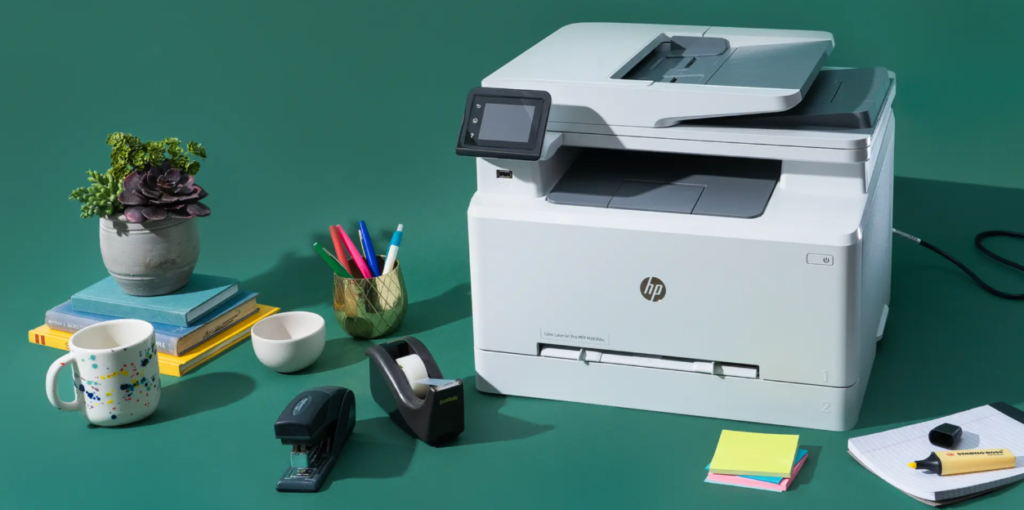
    So, you’ve finally gotten your hands on a brand-new printer. Congratulations! Now, it’s time to set it up and get to printing. But, before we jump into the installation, let’s take a step back and ensure we’ve covered our basics.

    Firstly, you need to unbox your printer and read the manual. Yes, the manual is important, reading the manual will save you from a lot of headaches in the future. Next, prepare your workspace. Ensure that there is enough room for the printer and the cables are within reach. With this check, you are ready to connect your printer.

    Connecting your Printer

    Most of the modern printers have two primary options: USB and Wi-Fi. If you are using a printer with a single device then a USB connection is good enough, however, If you want to connect your printer to multiple devices then the Wi-Fi route is the best option.

    Once you decide on the connection type, let’s move to the next steps. Now, plug in your printer to the power source. If you are using a USB cable plug one end of the cable into the printer and the other end on the computer. If you have a Wi-Fi connection make sure that both of the devices connect on a similar network. That’s it you are all set up and we move to another step.

    Initial Setup:

    Now, let’s turn on your printer. It is usually located on the top side of your printer. Once it is turned on it starts to make some noise. If the printer is not flashing and making any noise recheck the power supply, and USB cables and re-connect again.

    It is time to insert ink cartridges. All the different devices have different types of ink cartridges. In most printers, there are 4 slots for ink cartridges, they are black, Cyan, Magenta, and yellow. Some of the bigger office printers have ink tank cartridges.

    It is showing the four color of a printer. we normally used in every printer. 
New printer Ink Cartridges.

    FIG: Printer Ink Cartridges

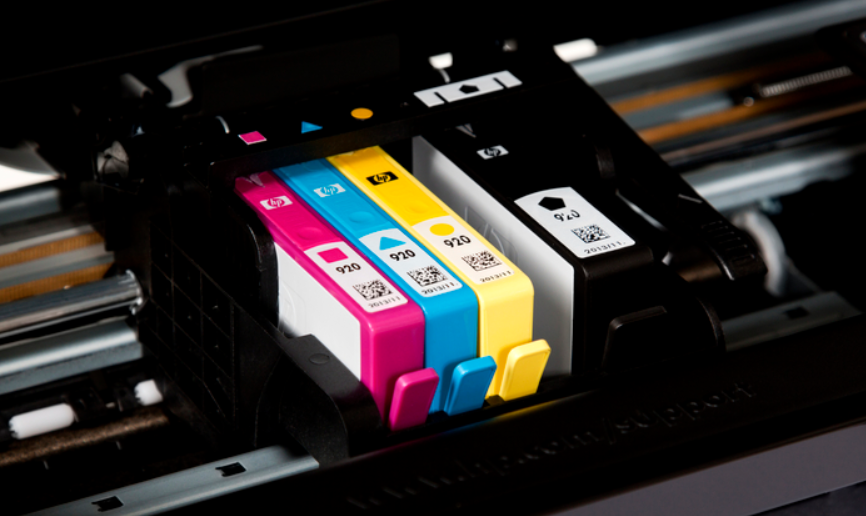
    Just make sure that you remove the stickers before inserting them. You must align the ink color according to the picture above. Finally, it’s time to load some paper. Make sure your printer is properly aligned with your paper tray, and that your paper is also stacked neatly.

    Installing Printer Driver

    Let’s download the printer driver from the manufacturer’s website. Make sure you typed the correct printer model otherwise, it’s not going to work. Once the download is complete, agree to the required terms and conditions for installation.

    When installing the driver choose the correct connection type and set up the required printer properties through the control panel. Modify your printout to your required size, quality, and ink density. Let’s move on to the next section and perform a test print.

    Test Print

    So, you have successfully connected your printer to the computer. it’s time to do a test print to ensure that everything is working as expected.

    To do the test print go to your computer settings and click on printers and scanners, then select your printer and click on manage. From there you can send a test page to your printer.

    Conclusion:

    Congratulations! You’ve successfully installed your brand-new printer. Now, you can print all the funky pictures and deep inspirational quotes available on the internet. Remember to maintain the hardware, and printer regularly, clean the printer heads, replace ink cartridges, and update the firmware. If you face any problems remember to troubleshoot printer issues or have a look at this link.

    computer Hardwa printer Troubleshooting
    Share. Facebook Twitter Pinterest LinkedIn Tumblr WhatsApp Email
    Previous ArticleHow to Use Technology to Improve Health
    Next Article How to Build and set up a brand new PC.
    neupanemadhav

    Related Posts

    Windows 10 End of Service: What Must Be Done

    19 March 2025

    Elementor #7217

    5 March 2025

    Why Windows is Still the Best for Gamers: A Deep Dive

    27 February 2025

    Accessing a Windows External Hard Drive on Mac

    26 February 2025
    Leave A Reply Cancel Reply

    This site uses Akismet to reduce spam. Learn how your comment data is processed.

    Demo
    Our Picks
    • Facebook
    • Twitter
    • Pinterest
    • Instagram
    • YouTube
    • Vimeo
    Don't Miss
    Business

    Windows 10 End of Service: What Must Be Done

    By Uneeb19 March 20250

    On October 14, 2025, Microsoft will officially end support for Windows 10, signalling a major shift…

    Elementor #7217

    5 March 2025

    Why Windows is Still the Best for Gamers: A Deep Dive

    27 February 2025

    Accessing a Windows External Hard Drive on Mac

    26 February 2025

    Subscribe to Updates

    Get the latest creative news from SmartMag about art & design.

    You too can join us

    If you also think about technology and want to contribute either as a mentor or even from a learner’s perspective, look no further and join us. Write us at [email protected] and share your opinion. Our team will get back by sending you an invite to join the platform as a contributor. Empower others, empower yourself so each one of us can play with the technology safely one day without being scared.

    Subscribe Here
    Loading
    For Partnership Worldwide

    Contact:

    [email protected]


    About Us
    About Us

    “Let’s Tech It Easy” or popularly known as “LTIE” is the blogging platform for everyone who wants to share and learn about technology. It is an initiative by the serial techpreneur Vish when he realized the wide gap between the pace at which the technology is evolving and at which it is getting adopted by a wider audience.

    Email Us: [email protected]

    Latest Posts

    Upgrading RAM

    10 March 2023

    Desktop Vs Laptop

    10 March 2023

    Data Recovery

    3 March 2023

    MacOS on Windows Virtual Box

    10 February 2023

    macOS Monterey and what’s new in it?

    12 April 2022
    New Comments
    • How to Troubleshoot Sound and Mic on Windows 10 - Let's Tech It Easy on How to Access Troubleshooters on Windows 10
    • How to Stay Safe While Using Public Wi-Fi Networks - Let's Tech It Easy on Internet Security for Home Users – VPN 101
    • How to Set up Oracle VirtualBox on a Mac - Let's Tech It Easy on How to Install Windows 10 on a Mac Using Boot Camp Assistant
    • DoS Attack Implementation and Prevention in Ubuntu – Let's Tech It Easy on Top Kali Linux Commands
    Facebook X (Twitter) Instagram Pinterest
    • Homepage
    • About
    • Blog
    • Contact
    • Computers
    • Cloud
    • Gaming
    • Cyber Security
    • iPhone
    • Mac
    • Windows
    • My Tickets
    • Submit Ticket
    © 2025 LetsTechitEasy. Designed by Sukrit Infotech.

    Type above and press Enter to search. Press Esc to cancel.

    Sign In or Register

    Welcome Back!

    Login below or Register Now.

    Lost password?

    Register Now!

    Already registered? Login.

    A password will be e-mailed to you.