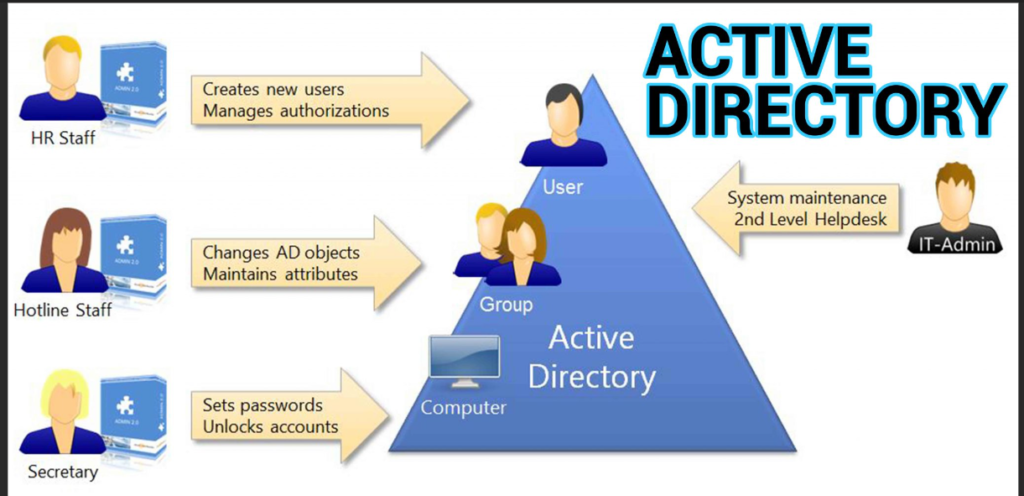
Active Directory (AD) is a powerful tool for managing network resources in a Windows environment. It provides centralized authentication and authorization, and allows administrators to manage users, computers, and other network resources from a single location. In this blog, we will discuss how to set up Active Directory in Windows Server.
Before we begin, it is important to note that Active Directory requires a Windows Server operating system. Therefore, you must first have a Windows Server installed and configured before proceeding with the steps outlined in this blog.

Step 1: Install Active Directory Domain Services (AD DS)
The first step in setting up Active Directory is to install the Active Directory Domain Services (AD DS) role on your Windows Server. To do this, follow these steps:
- Open Server Manager by clicking on the Server Manager icon in the taskbar or by searching for it in the Start menu.
- Click on Manage in the top right corner of the Server Manager window and select Add Roles and Features.
- Click Next until you reach the Server Roles screen, and then select Active Directory Domain Services.
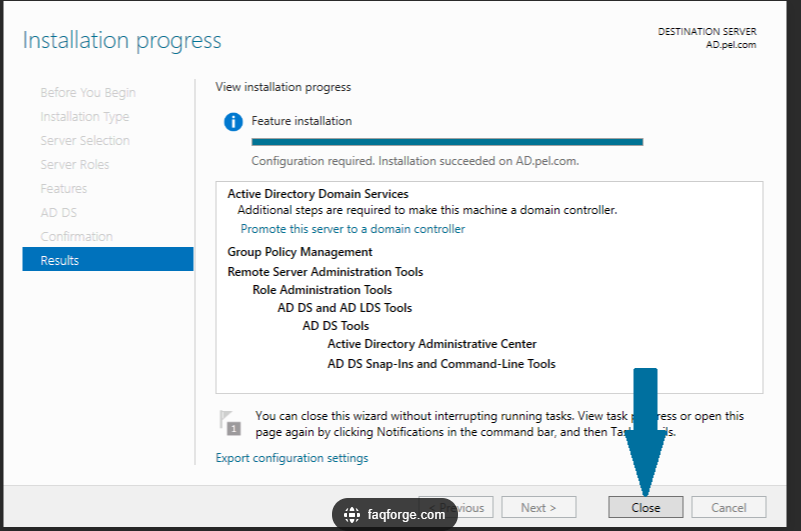
- Follow the on-screen instructions to complete the installation process.

Step 2: Promote the Server to a Domain Controller
Once the AD DS role is installed, the next step is to promote the server to a domain controller. To do this, follow these steps:
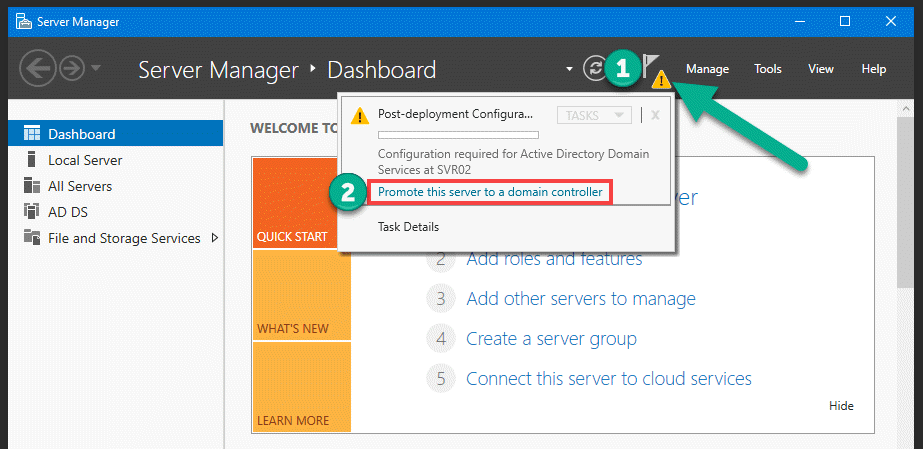
- Open the Server Manager and click on the notification flag in the top right corner of the window.
- Click on Promote this server to a domain controller.
- In the Deployment Configuration screen, select Add a new forest and enter the root domain name that you want to use.
- In the Domain Controller Options screen, select the appropriate options for your environment.
- In the DNS Options screen, select the appropriate options for your environment.
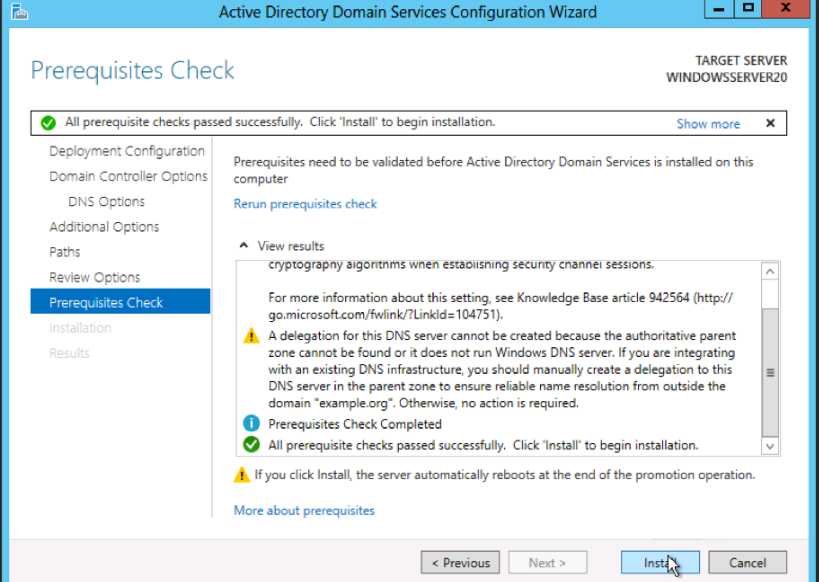
- Follow the on-screen instructions to complete the promotion process.

Step 3: Configure Active Directory
Once the server has been promoted to a domain controller, the next step is to configure Active Directory. To do this, follow these steps:
- Open the Active Directory Users and Computers console by clicking on the Start menu and selecting Administrative Tools > Active Directory Users and Computers.
- Create the necessary organizational units (OUs) to organize your resources. For example, you might create OUs for departments, geographic locations, or job roles.
- Create user accounts for each user that will need to access network resources.
- Create computer accounts for each computer that will need to access network resources.
- Create groups to organize users and computers into logical groups. For example, you might create a group for each department or job role.
- Assign permissions to resources by using group membership.
Step 4: Configure Group Policy
Group Policy is a powerful tool for managing computer and user settings in an Active Directory environment. To configure Group Policy, follow these steps:
- Open the Group Policy Management console by clicking on the Start menu and selecting Administrative Tools > Group Policy Management.
- Create a new Group Policy Object (GPO) or edit an existing one.
- Configure the settings that you want to apply to computers and users.
- Link the GPO to the appropriate OU or container.
- Verify that the GPO is being applied by logging on to a computer as a user that is a member of the appropriate group.

Conclusion
Setting up Active Directory is an important task for any Windows administrator. By following the steps outlined in this blog, you can easily set up Active Directory and begin managing your network resources from a central location. Remember to configure Group Policy to ensure that your network is secure and your users are productive. With Active Directory in place, you can simplify the management of your network and improve the overall efficiency of your organization.
