
VMware is a cloud computing and virtualization technology company that has its headquarters in California, United States. It is a leading technology in the field of hardware virtualization which allows the users worldwide to install and use virtual machines with operating systems such as windows, Linux etc. on various hosts. It also allows systems to migrate virtual machines between the hosts (Suse, 2020). These Virtual machines are mainly used to test applications that can only be run on some specific operating system which is not present on the user’s system. Instead of installing the operating system on the whole system, user can use VMware to create virtual machine to run the required OS to test the application. In this blog, we will focus on installing the Apple’s Mac OS using VMware. The latest version of the Mac OS is Monterey that has been released by Apple in 2021. In the upcoming sections, the procedures to install Monterey Mac OS using VMware on windows operating systems are defined.
Steps to install Mac OS Monterey using VMware
1. Download Important Files
The installing process begins with the download of some important files required such as
- VMware Workstation pro 16.1.x
- Mac OS unlocker V3
- Mac OS Monterey ISO
- VMware Tools
2. Install Downloaded Files
After downloading these files, the next step is to install the downloaded VMware Workstation pro 16 on the system. After installing the workstation, the on screen instructions are provided to assist user in completing the setup. Upon agreeing the terms and conditions of the workstation, the setup process of the workstation will be completed.
3. Unlock VMware
Successful completion of the setup process will lead the user to the unlocking phase. In this, the VMware is unlocked to install Mac OS Monterey on windows operating system. The unlocking process includes the Mac OS unlocker V3 file that has been downloaded earlier. The user need to extract the zip file download for mac OS unlocker and locate the win-install.cmd file. Upon right clicking on the file select Run as Administrator option. After that, the on screen instructions assists the user in completing the set up process (howtoisolve, 2021)
4. Create New Virtual Machine
After setting up the Mac OS unlocker, the next process is to create a new virtual machine on VMware. The Monterey Mac OS will be installed on this virtual machine using VMware. The process includes following steps-
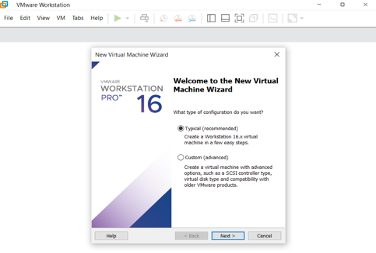
- Open the VMware software on the pc and then select Create a New Virtual Machine I option from the homepage. The configuration setting is recommended to be selected as Typical by the VMware.
- The Guest Operating System installation page will be displayed to the user in which the user need to select I will install the operating system later option and then, click next.

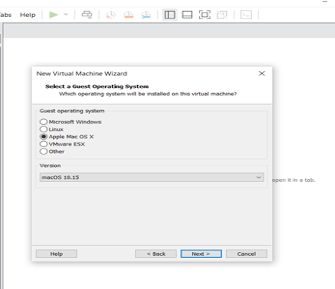
- After this, a list of operating systems are displayed on the screen among which, the user need to select the Apple Mac OS option and click next (Jafari, 2021).
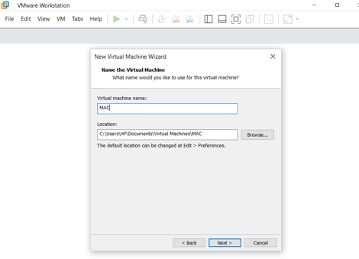
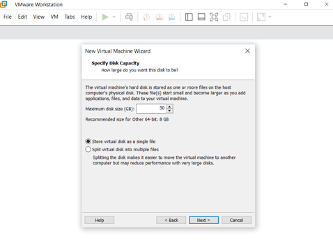
- The next process includes naming of the virtual machine that can be anything according to the user’s preference. After that, the user will be asked to set a location to save the virtual machine files. Simply clicking on next option will take the user to the next page where the VMware will ask the user to specify the disk size that is recommended to be more than 50GB. Then, click on the store virtual disk as a single file and move further upon clicking next.
- Next, Ready to Create Virtual Machine page will be displayed on which the user need to click on customize hardware option. While customizing hardware settings, the user can increase the default memory allocation of 4GB to 8GB for better performance. Similarly, for processors, the user can increase the setting from 2 cores to $ cores for faster and smoother operations.
- As the Virtual Machine creation process moves to its final stage, the user need to choose New CD/DVD (SATA) option from the menu and then, select Use ISO image file. In this option, the user need to attach the Mac OS Monterey ISO image file that has been downloaded earlier, by selecting the browse option. After successfully selecting the ISO file, the user need to click close option to save all the changes made on the New virtual machine window wizard and click finish (howtoisolve, 2021).
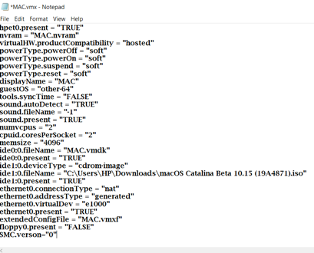
5. Configure Mac OS Monterey VMX File
The next process is to configure the Mac OS Monterey VMX file. For this, the user need to navigate the folder that he has selected for saving the VM files. On that folder, the user will find a mac OS Monterey VMX file which the user need to open on Notepad. On Notepad, the user need to add the following code at the end of the file and then, save the Notepad file.
SMC.verson=”0”
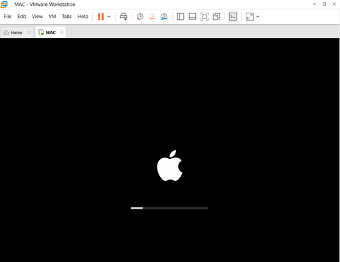
6. Start the Virtual Machine
After configuring the VMX file, the next process is to start the Mac OS Monterey virtual machine which includes following steps-
- The user need to open the Mac OS Monterey window and then click Power on the Virtual Machine.
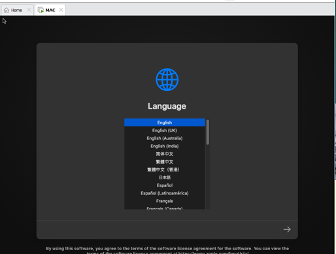
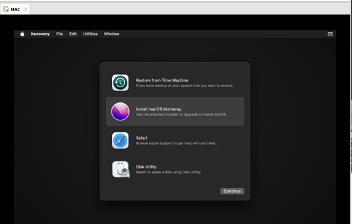
- A list of language options are displayed to the user to choose the language of his preference.
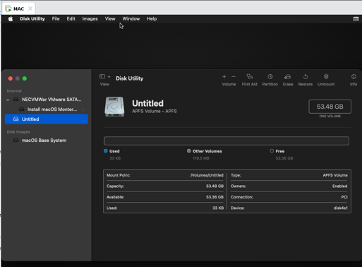
- After selecting the language, the next step is to select the Disk Utility options among the list of different option and then select continue.
- The next process is to erase the VMware Virtual SATA Hard Drive Media.
- After erasing the drive media, a dialogue box will be displayed where the user need to write name the drive such as mac OS Monterey HD, the format will be APFS. Then, upon clicking on erase, the mac OS Monterey disk will be erased completely.
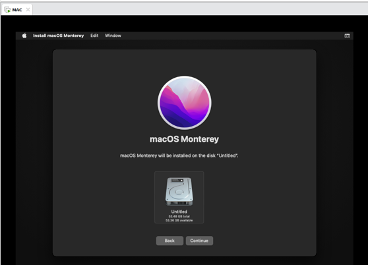
- Next, the user need to click on the Disk Utility Tab from the menu and then click Quit Disk Utility.
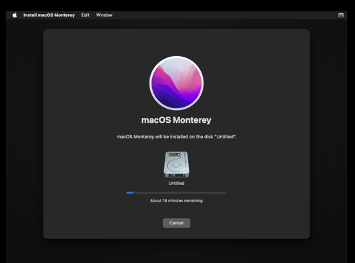
- After that, a dialogue box will be displayed from which the user need to select Install mac OS 12 Beta option. Upon agreeing the terms and conditions, the installation will start and take approximately 15-30 minutes to complete.
7. Complete the installation process
After installing the mac OS Monterey on Virtual Machine, the user need to complete the basic mac OS account settings including the country, keyboard layout, accessibility features, connection settings etc. Upon agreeing the terms and conditions, the basic OS setting will be complete and the user will be redirected to account creation page. After creating an account, the process of installing Mac OS on windows using VMware will be completed (Jafari, 2021).
References
- Howtoisolve. (2021). How to install MacOS Monterey on Windows PC using VMWARE. HOWTOISOLVE. Retrieved from https://www.howtoisolve.com/how-to-install-macos-monterey-on-windows-pc-using-vmware/
- Jafari, M. (2021). How to Install macOS Monterey on VMware on Windows – PC – wikigain. wikigain. Retrieved from https://www.wikigain.com/how-to-install-macos-monterey-on-vmware-on-windows-pc/
- suse. (2020). What is VMware? | Answer from SUSE Defines. SUSE Defines. Retrieved from https://www.suse.com/suse-defines/definition/vmware/