Close Menu

    Subscribe to Updates

    Get the latest creative news from FooBar about art, design and business.

    What's Hot

    Windows 10 End of Service: What Must Be Done

    19 March 2025

    Elementor #7217

    5 March 2025

    Why Windows is Still the Best for Gamers: A Deep Dive

    27 February 2025
    Facebook X (Twitter) Instagram
    Facebook X (Twitter) Instagram Vimeo
    Let's Tech It Easy
    Subscribe Login
    • Homepage
    • About
    • Blog
      • Computers
      • Cloud
      • Gaming
      • Cyber Security
      • iPhone
      • Mac
      • Windows
      • Android
    • Contact
    • My Tickets
    • Submit Ticket
    Let's Tech It Easy
    Home»Computers»How to format your hard drive in Mac to be used on both Windows and Mac?
    Computers

    How to format your hard drive in Mac to be used on both Windows and Mac?

    letstechiteasyBy letstechiteasy2 October 2020Updated:2 October 2020No Comments4 Mins Read
    Facebook Twitter Pinterest LinkedIn Tumblr WhatsApp VKontakte Email
    Share
    Facebook Twitter LinkedIn Pinterest Email

    Want to use one external drive for both your Windows PC and your Mac? One hurdle you’ll face is that, by default, these platforms use different filesystems. Windows uses NTFS and Mac OS uses HFS and they’re incompatible with each other. However, you can format the drive to work with both Windows and Mac by using the exFAT filesystem. Here’s how.

    In this guide we’re using exFAT instead of FAT32, another filesystem that both Windows and Mac can read and write to, because FAT32 has a maximum 4GB file size limit whereas exFAT can work with files as large as 16EB (exabytes). exFAT also performs better than FAT32.

    You can format the drive from either the Mac or the Windows machine. However, if you want to use part of the drive for OS X’s Time Machine backups, you should do this from the Mac, since there’s an extra step to make the drive compatible for Time Machine. To secure your home computer well, you are suggested to contact your local computer expert like “Computer Repair Onsite”.

    How to Format an External Drive in OS X

    1. Connect the drive to the Mac.

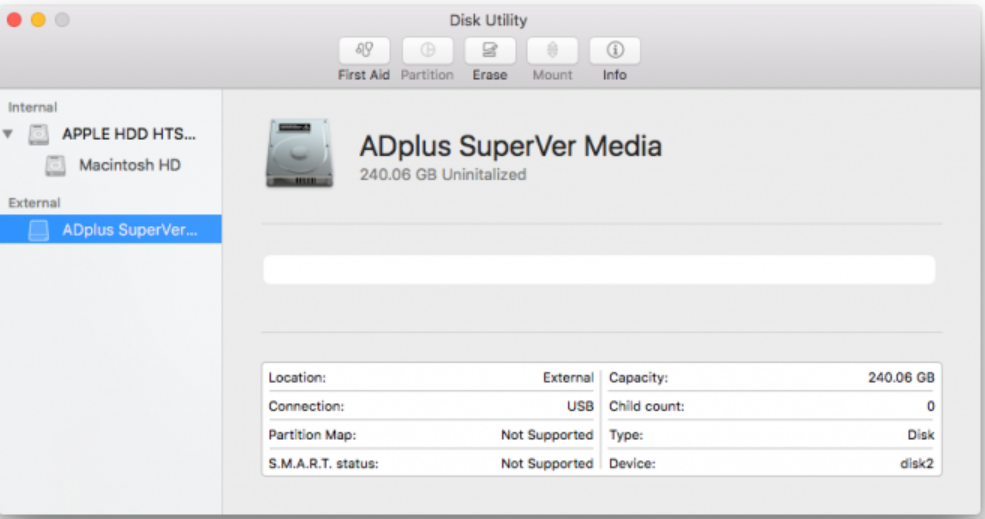
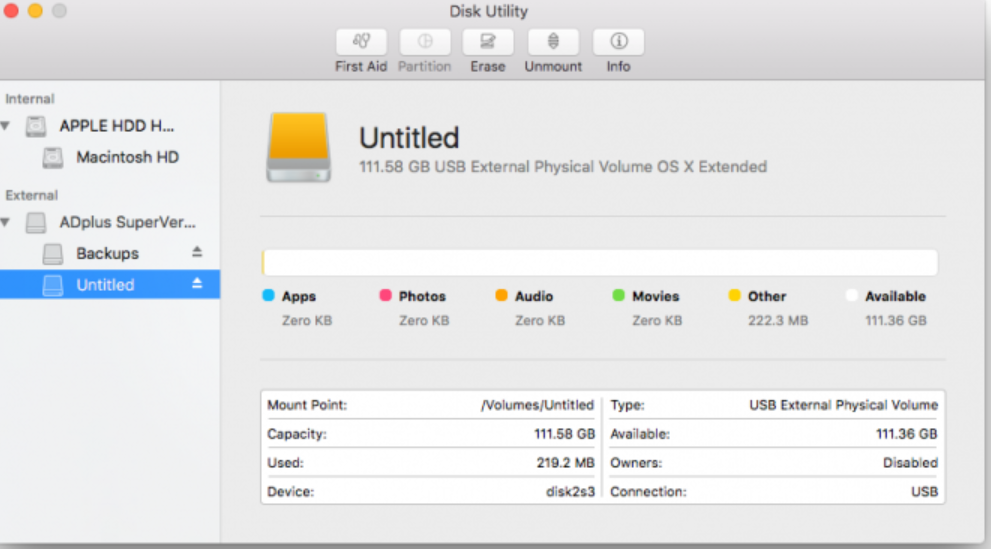
    2. Open Disk Utility. The easiest way to do that is hit CMD and the spacebar at the same time and type in Disk Utility to find the program.

    3. Select the drive you want to format.
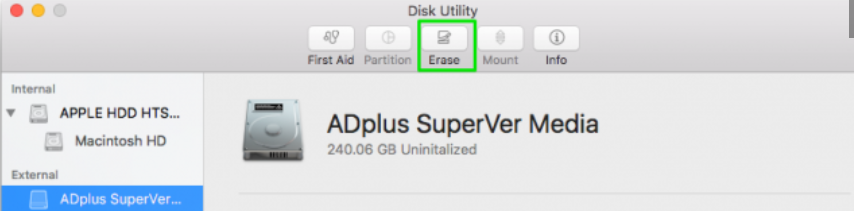
    4. Click Erase.

    If you don’t plan on using the drive for Time Machine, skip steps 5 to 11 below and continue with step 12.

    5. Give the drive a descriptive name and leave the default settings: OS X Extended format and GUID partition map. These will format the drive in OS X’s HFS+ filetype so it will be compatible with Time Machine.

    6. Click Erase and OS X will format the drive.

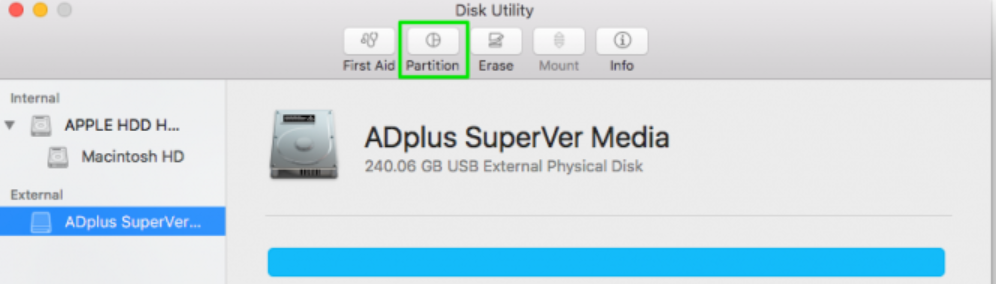
    7. With the drive selected in Disk Utility, click Partition.

    8. Enter the amount of space you want to set aside for Time Machine. In this example, we’re shrinking the Time Machine partition to 128 GB instead of allowing Time Machine to take up the whole drive.
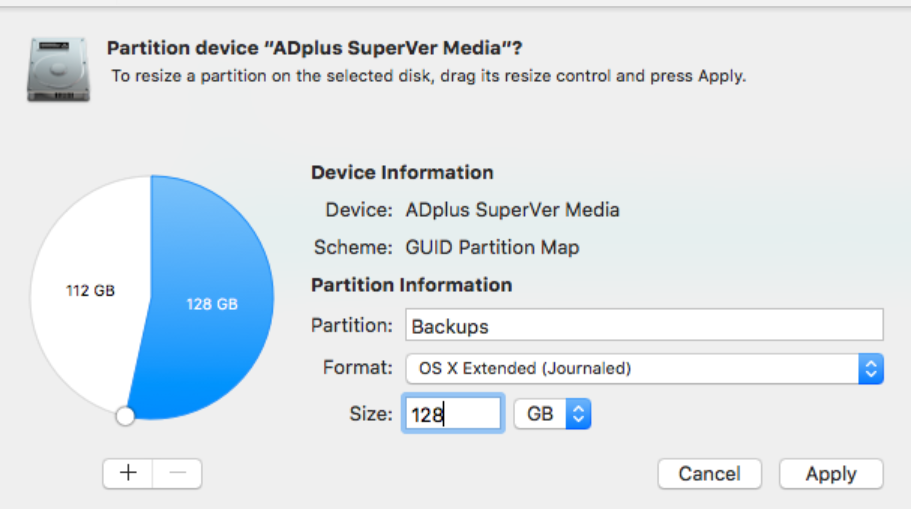
    9. Click Apply.

    10. Select the new untitled partition so we can format it as exFAT for use with both Mac and Windows.

    11. Click Erase.

    12. Give the partition a name and select exFAT for the format.

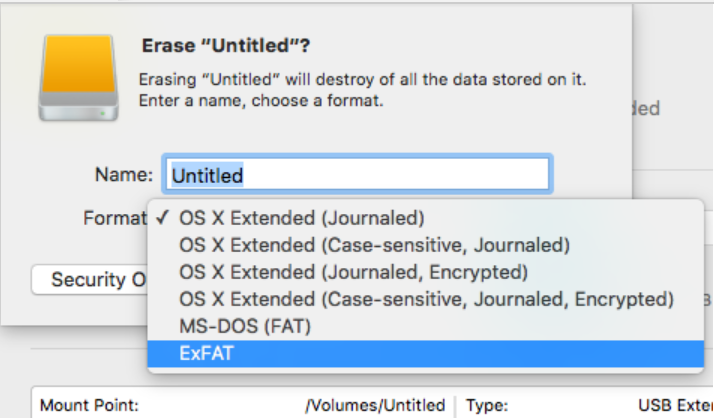
    13. Click Erase to finish.

    Your exFAT-formatted drive or partition can now be used for both Windows and Mac. Note that using a drive frequently between Windows and Mac could increase the chances of file corruption, so make sure you have backups of the files on the shared drive and be extra careful about safely ejecting the drive before disconnecting it from your computer. If you somehow need help, you must approach a reliable cyber security expert like BITS.

    How to Format an External Drive in Windows

    The instructions below are for Windows 10, but other versions of Windows from Windows 7 and up can also format an external drive as exFAT for use with Mac as well.

    1. Connect the drive to your Windows PC.

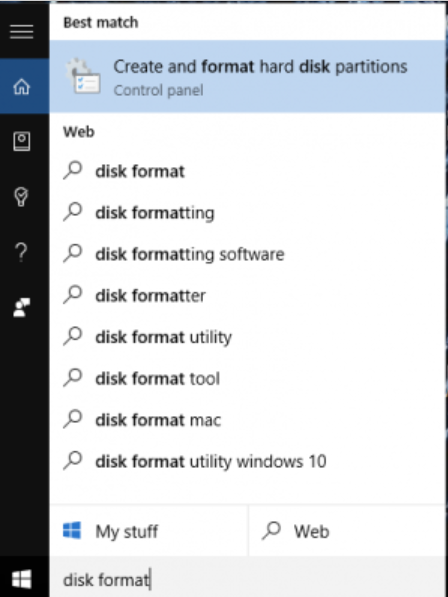
    2. Open the Disk Management tool. You can do that by typing “disk format” or “disk management” in Windows search or going to Control Panel > Administrative Tools > Create and format hard disk partitions.

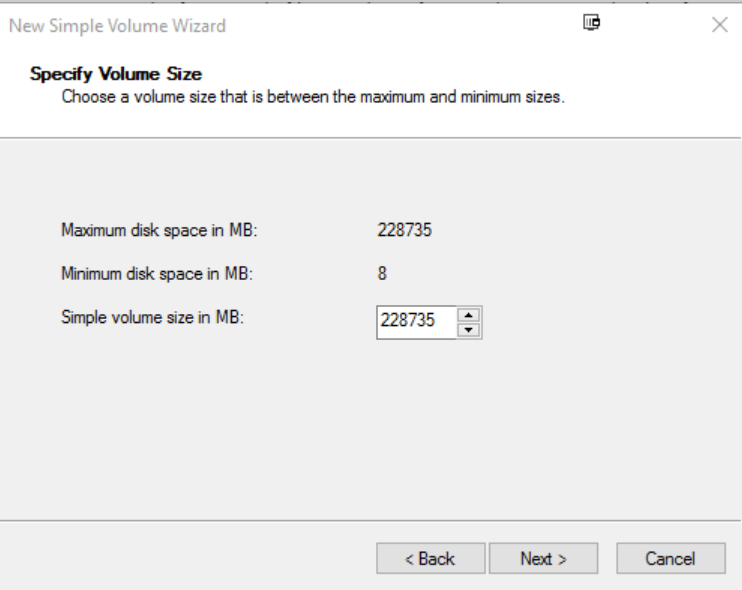
    3. Right-click on the external drive’s partition or unallocated space you want to format and choose New Simple Volume…

    4. Follow the wizard to choose a volume size.

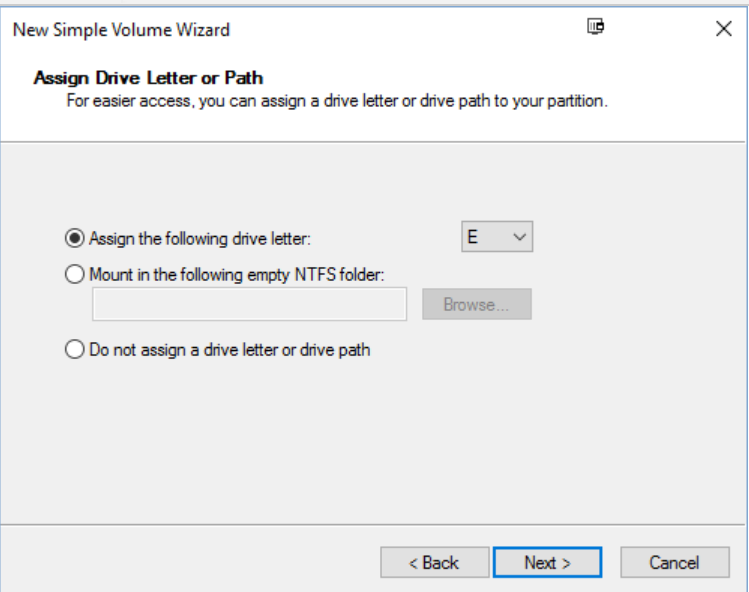
    5. Assign a drive letter.

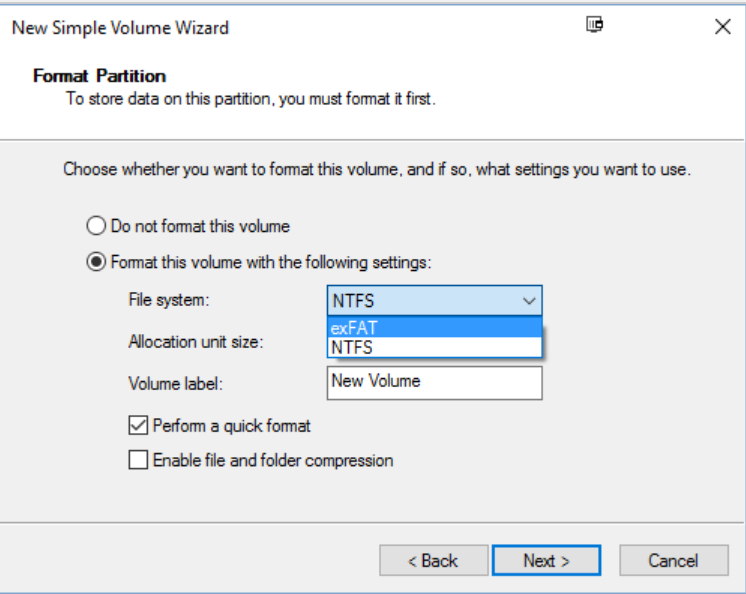
    6. Choose exFAT as the file system in the Format Partition screen.

    7. Give the volume a new name.
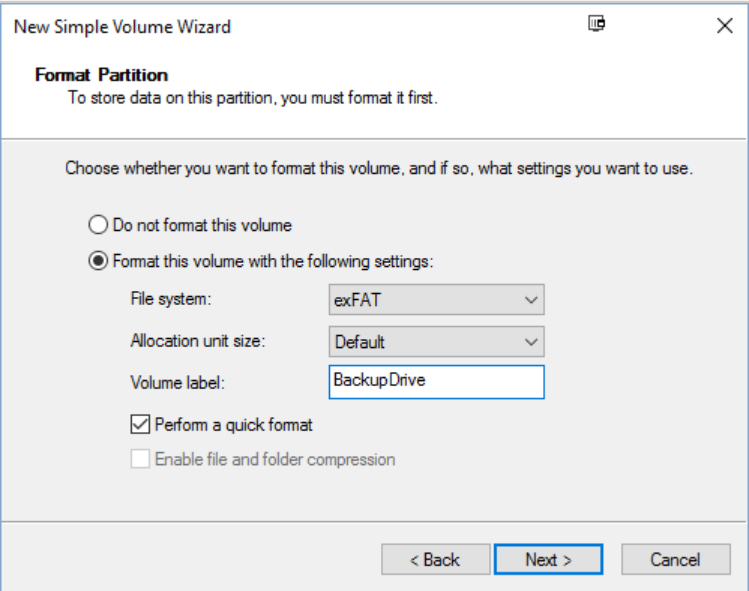
    8. Click Next.

    9. Click Finish.

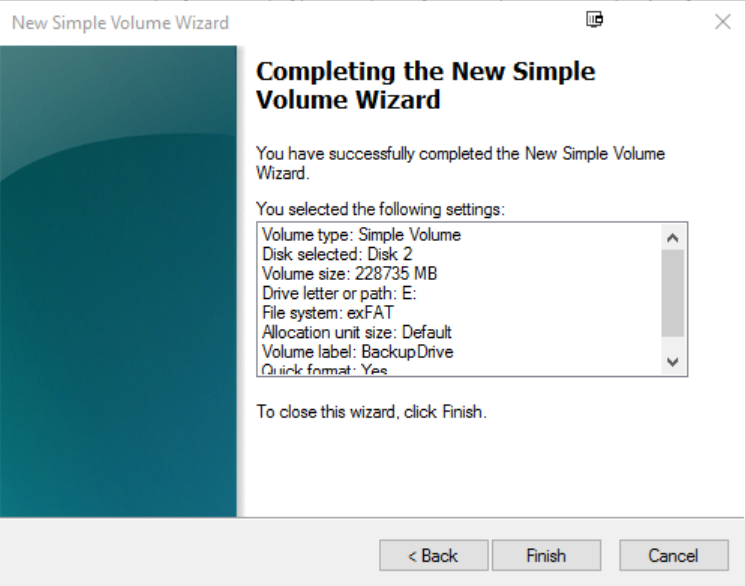
    Windows will format the drive as exFAT and you’ll be able to use the drive on both Windows and Mac. To purchase the software, you can go to the website like X-Tech Buy.

    Share. Facebook Twitter Pinterest LinkedIn Tumblr WhatsApp Email
    Previous ArticleWhat is Social Engineering. Tips to Improve Your Defenses Against Social Engineering Attacks
    Next Article What to do if your device is not visible on i-tunes?
    letstechiteasy
    • Website

    Related Posts

    Windows 10 End of Service: What Must Be Done

    19 March 2025

    Elementor #7217

    5 March 2025

    Why Windows is Still the Best for Gamers: A Deep Dive

    27 February 2025

    Accessing a Windows External Hard Drive on Mac

    26 February 2025
    Leave A Reply Cancel Reply

    This site uses Akismet to reduce spam. Learn how your comment data is processed.

    Demo
    Our Picks
    • Facebook
    • Twitter
    • Pinterest
    • Instagram
    • YouTube
    • Vimeo
    Don't Miss
    Business

    Windows 10 End of Service: What Must Be Done

    By Uneeb19 March 20250

    On October 14, 2025, Microsoft will officially end support for Windows 10, signalling a major shift…

    Elementor #7217

    5 March 2025

    Why Windows is Still the Best for Gamers: A Deep Dive

    27 February 2025

    Accessing a Windows External Hard Drive on Mac

    26 February 2025

    Subscribe to Updates

    Get the latest creative news from SmartMag about art & design.

    You too can join us

    If you also think about technology and want to contribute either as a mentor or even from a learner’s perspective, look no further and join us. Write us at [email protected] and share your opinion. Our team will get back by sending you an invite to join the platform as a contributor. Empower others, empower yourself so each one of us can play with the technology safely one day without being scared.

    Subscribe Here
    Loading
    For Partnership Worldwide

    Contact:

    [email protected]


    About Us
    About Us

    “Let’s Tech It Easy” or popularly known as “LTIE” is the blogging platform for everyone who wants to share and learn about technology. It is an initiative by the serial techpreneur Vish when he realized the wide gap between the pace at which the technology is evolving and at which it is getting adopted by a wider audience.

    Email Us: [email protected]

    Latest Posts

    Upgrading RAM

    10 March 2023

    Desktop Vs Laptop

    10 March 2023

    Data Recovery

    3 March 2023

    MacOS on Windows Virtual Box

    10 February 2023

    macOS Monterey and what’s new in it?

    12 April 2022
    New Comments
    • How to Troubleshoot Sound and Mic on Windows 10 - Let's Tech It Easy on How to Access Troubleshooters on Windows 10
    • How to Stay Safe While Using Public Wi-Fi Networks - Let's Tech It Easy on Internet Security for Home Users – VPN 101
    • How to Set up Oracle VirtualBox on a Mac - Let's Tech It Easy on How to Install Windows 10 on a Mac Using Boot Camp Assistant
    • DoS Attack Implementation and Prevention in Ubuntu – Let's Tech It Easy on Top Kali Linux Commands
    Facebook X (Twitter) Instagram Pinterest
    • Homepage
    • About
    • Blog
    • Contact
    • Computers
    • Cloud
    • Gaming
    • Cyber Security
    • iPhone
    • Mac
    • Windows
    • My Tickets
    • Submit Ticket
    © 2025 LetsTechitEasy. Designed by Sukrit Infotech.

    Type above and press Enter to search. Press Esc to cancel.

    Sign In or Register

    Welcome Back!

    Login below or Register Now.

    Lost password?

    Register Now!

    Already registered? Login.

    A password will be e-mailed to you.