Close Menu

    Subscribe to Updates

    Get the latest creative news from FooBar about art, design and business.

    What's Hot

    Windows 10 End of Service: What Must Be Done

    19 March 2025

    Elementor #7217

    5 March 2025

    Why Windows is Still the Best for Gamers: A Deep Dive

    27 February 2025
    Facebook X (Twitter) Instagram
    Facebook X (Twitter) Instagram Vimeo
    Let's Tech It Easy
    Subscribe Login
    • Homepage
    • About
    • Blog
      • Computers
      • Cloud
      • Gaming
      • Cyber Security
      • iPhone
      • Mac
      • Windows
      • Android
    • Contact
    • My Tickets
    • Submit Ticket
    Let's Tech It Easy
    Home»iPhones»How to Factory-reset a Password Locked iPhone Using iTunes
    iPhones

    How to Factory-reset a Password Locked iPhone Using iTunes

    ThanatchaBy Thanatcha13 May 2021Updated:28 July 2021No Comments2 Mins Read
    Facebook Twitter Pinterest LinkedIn Tumblr WhatsApp VKontakte Email
    Share
    Facebook Twitter LinkedIn Pinterest Email

    If you set a new password for your iPhone recently and cannot seem to remember it, you will find out after a couple of failed attempts that your device is now disabled. Please do not fret. This blog will guide you through the steps necessary to factory reset your locked or disabled iPhone. Please be aware that by doing so, the content and settings will be erased. In case that you have backed up your device previously, you will be able to restore your data. 

    For backup specific assistance, please contact BITS specialist here. If you require any general technical support, please reach out to CROS.

    Steps to Factory-reset an iPhone

    1. Unplug if your device is connected to your computer
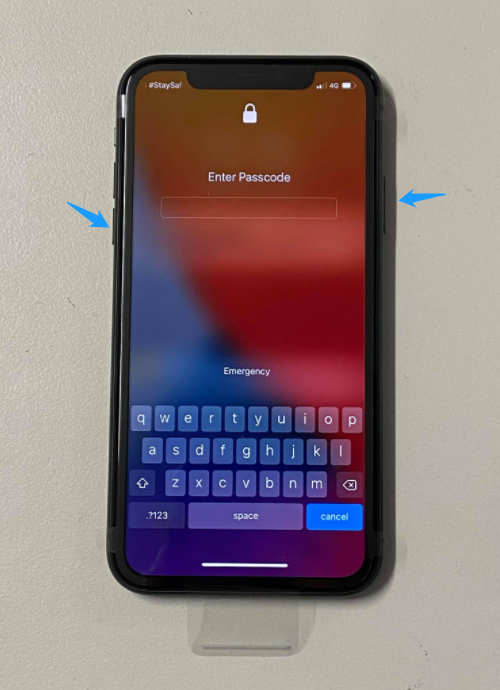
    2. Bring up the power-off slider by holding the side button (right) and a volume button (left). 
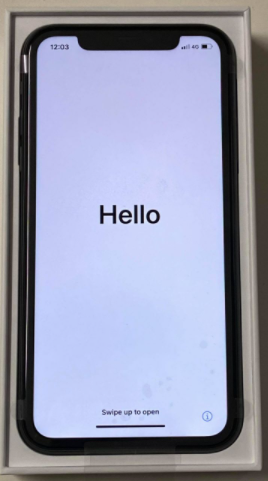
    1. Once you see the below screen, drag the slider to turn it off
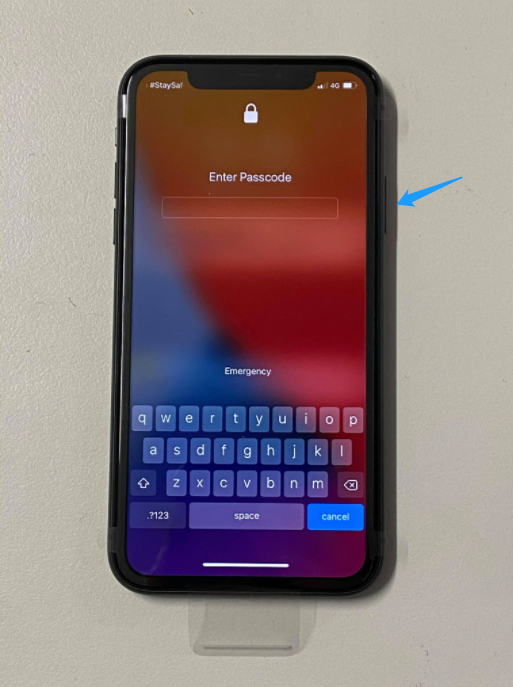
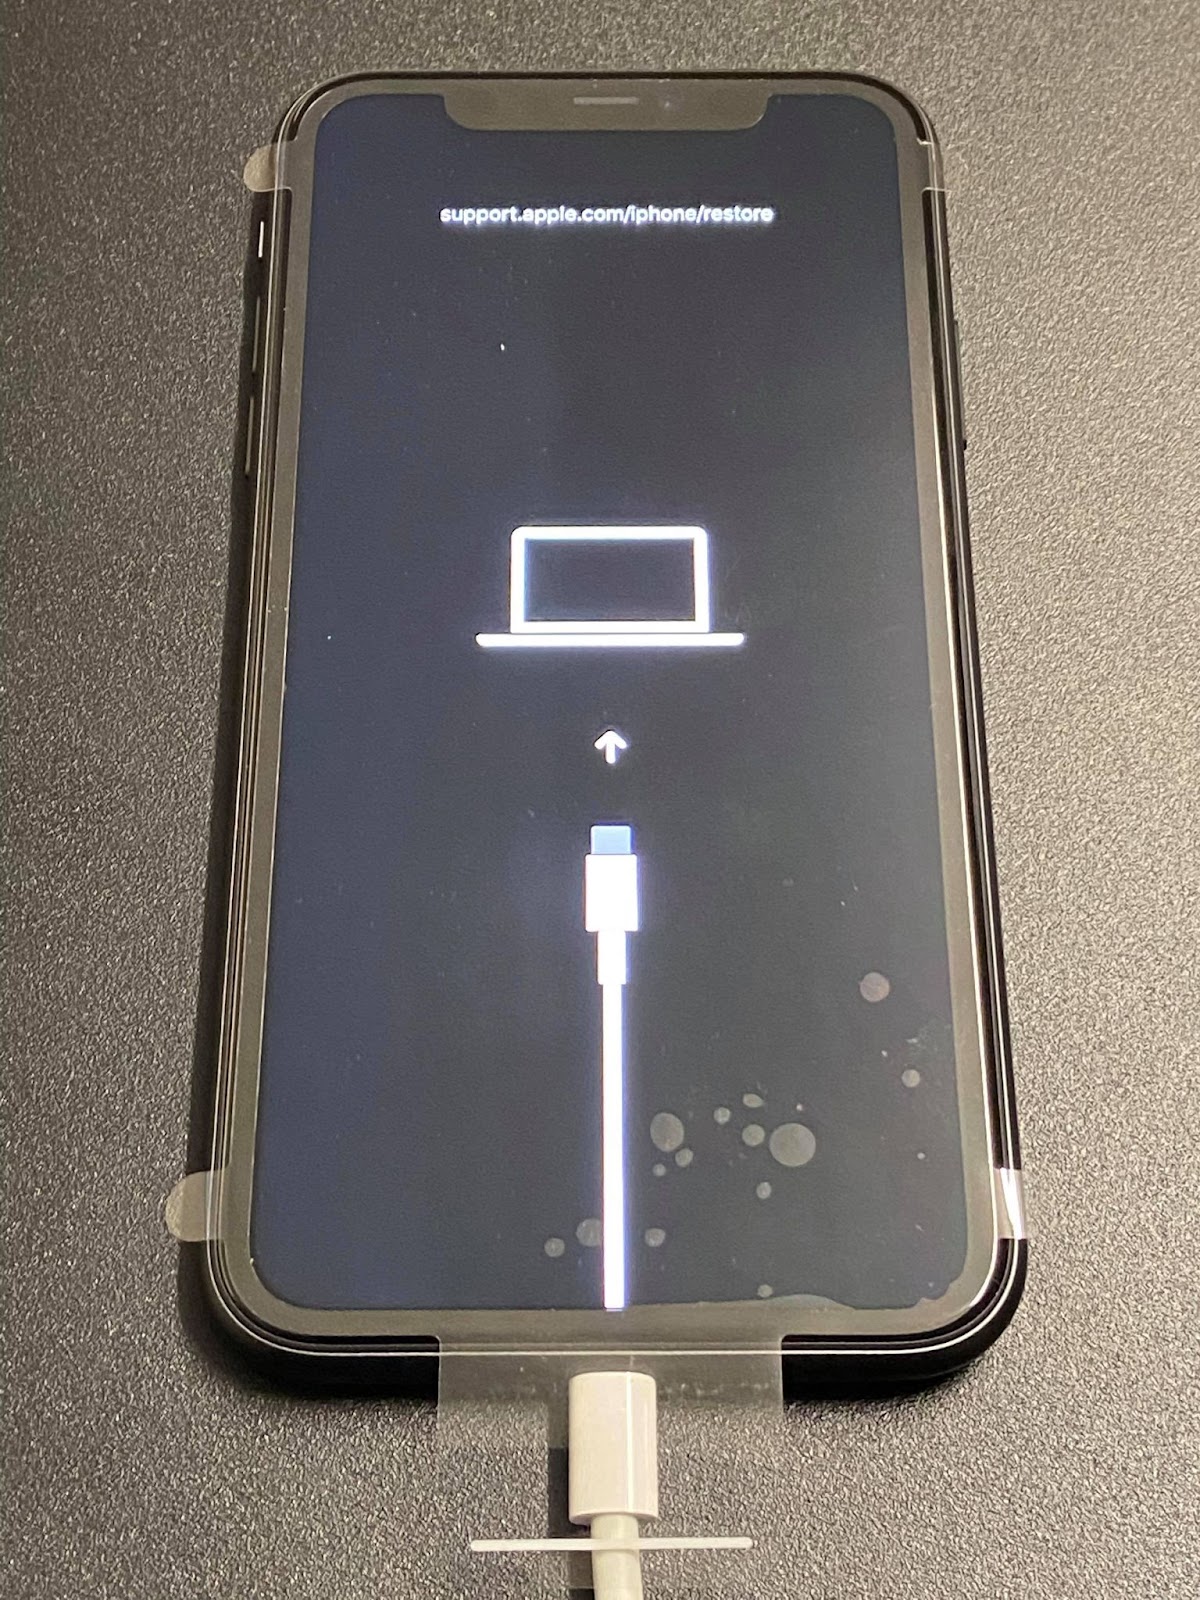
    1. Connect your iPhone to your computer and keep holding a side button (right) until you see the recovery mode screen (below)
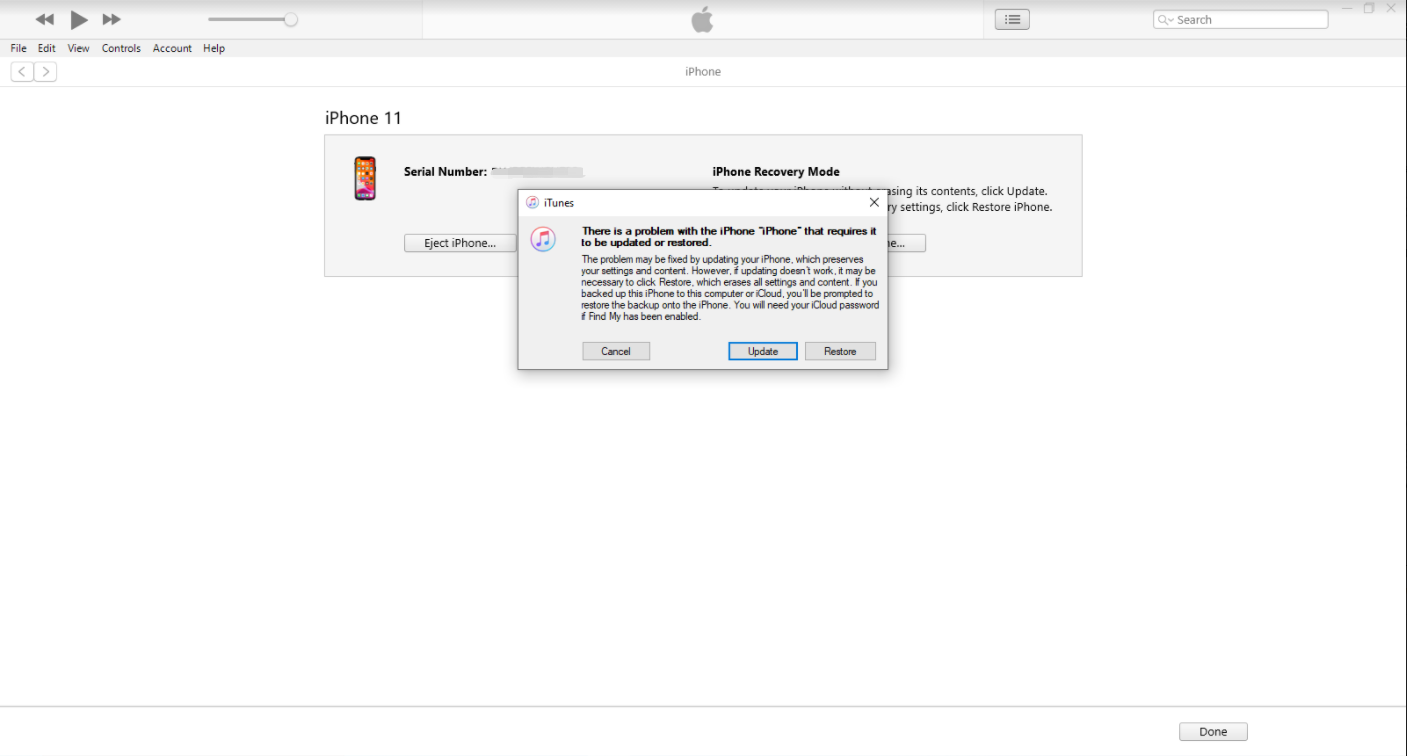
    1. Open iTunes on your computer
    1. Click the Restore button
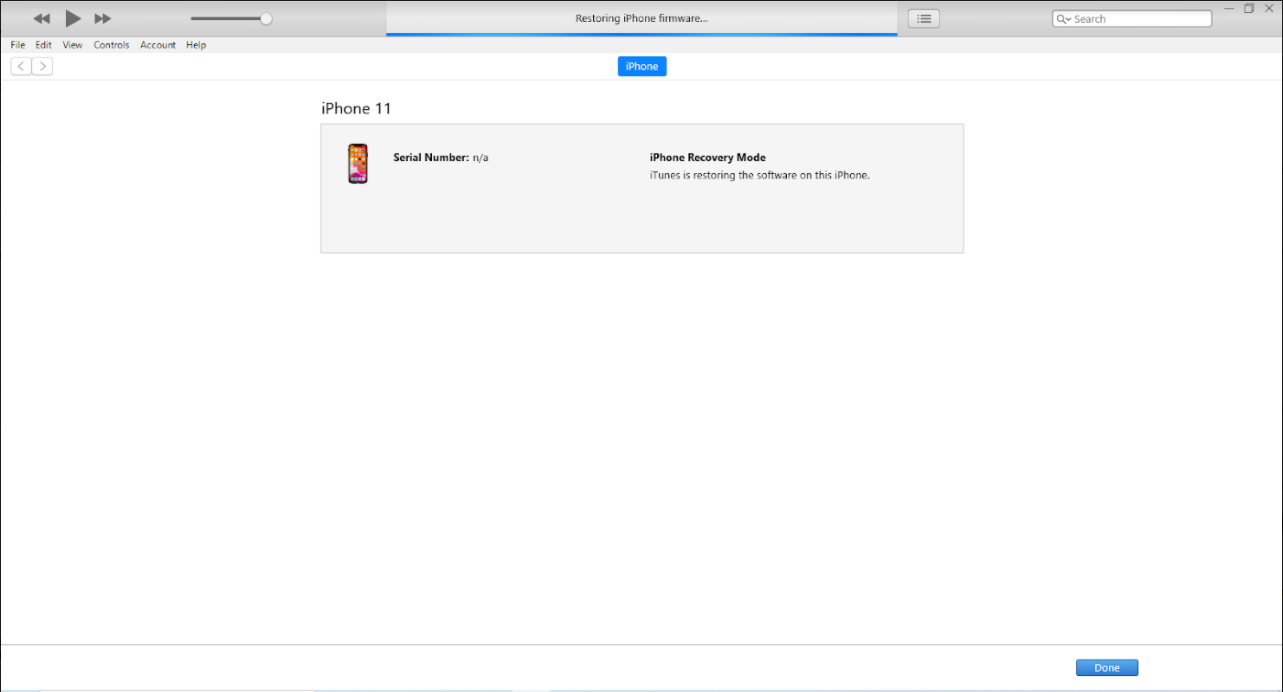
    1. Once the restoring process starts, you will see the below screen. Now all you have to do is wait for the process to finish.
    1. After the iPhone is restored to factory reset, you will end up with a brand new iPhone.
    Share. Facebook Twitter Pinterest LinkedIn Tumblr WhatsApp Email
    Previous ArticleHow to Set Up and Start Using a VPN on Windows 10
    Next Article COMPUTER NETWORKING-A chain of computers
    Thanatcha

    Related Posts

    Windows 10 End of Service: What Must Be Done

    19 March 2025

    Basic Differences Between MacOS and Windows 10: Which One is Right for You? 

    19 February 2025

    Mastering Windows Registry: Tips for Power Users

    29 May 2024

    Securing Your Online World: VPN Guide for Windows and macOS

    19 January 2024
    Leave A Reply Cancel Reply

    This site uses Akismet to reduce spam. Learn how your comment data is processed.

    Demo
    Our Picks
    • Facebook
    • Twitter
    • Pinterest
    • Instagram
    • YouTube
    • Vimeo
    Don't Miss
    Business

    Windows 10 End of Service: What Must Be Done

    By Uneeb19 March 20250

    On October 14, 2025, Microsoft will officially end support for Windows 10, signalling a major shift…

    Elementor #7217

    5 March 2025

    Why Windows is Still the Best for Gamers: A Deep Dive

    27 February 2025

    Accessing a Windows External Hard Drive on Mac

    26 February 2025

    Subscribe to Updates

    Get the latest creative news from SmartMag about art & design.

    You too can join us

    If you also think about technology and want to contribute either as a mentor or even from a learner’s perspective, look no further and join us. Write us at [email protected] and share your opinion. Our team will get back by sending you an invite to join the platform as a contributor. Empower others, empower yourself so each one of us can play with the technology safely one day without being scared.

    Subscribe Here
    Loading
    For Partnership Worldwide

    Contact:

    [email protected]


    About Us
    About Us

    “Let’s Tech It Easy” or popularly known as “LTIE” is the blogging platform for everyone who wants to share and learn about technology. It is an initiative by the serial techpreneur Vish when he realized the wide gap between the pace at which the technology is evolving and at which it is getting adopted by a wider audience.

    Email Us: [email protected]

    Latest Posts

    Upgrading RAM

    10 March 2023

    Desktop Vs Laptop

    10 March 2023

    Data Recovery

    3 March 2023

    MacOS on Windows Virtual Box

    10 February 2023

    macOS Monterey and what’s new in it?

    12 April 2022
    New Comments
    • How to Troubleshoot Sound and Mic on Windows 10 - Let's Tech It Easy on How to Access Troubleshooters on Windows 10
    • How to Stay Safe While Using Public Wi-Fi Networks - Let's Tech It Easy on Internet Security for Home Users – VPN 101
    • How to Set up Oracle VirtualBox on a Mac - Let's Tech It Easy on How to Install Windows 10 on a Mac Using Boot Camp Assistant
    • DoS Attack Implementation and Prevention in Ubuntu – Let's Tech It Easy on Top Kali Linux Commands
    Facebook X (Twitter) Instagram Pinterest
    • Homepage
    • About
    • Blog
    • Contact
    • Computers
    • Cloud
    • Gaming
    • Cyber Security
    • iPhone
    • Mac
    • Windows
    • My Tickets
    • Submit Ticket
    © 2025 LetsTechitEasy. Designed by Sukrit Infotech.

    Type above and press Enter to search. Press Esc to cancel.

    Sign In or Register

    Welcome Back!

    Login below or Register Now.

    Lost password?

    Register Now!

    Already registered? Login.

    A password will be e-mailed to you.