
Google Forms is a free survey tool. It is a part of G Suite – which is a Google’s complete office suite. Google Forms allows users to collect the information from people via personalized quizzes or surveys. You can then connect the information to a spreadsheet on Sheets to automatically record the answers from surveys. The spreadsheet then populates with the responses from the quiz or survey in real-time. This makes Google Forms one of the easiest ways to save data from quizzes or surveys directly into a spreadsheet.
With Forms, you can start surveys, collect RSVPs, or create quizzes for students with a simple online form. You can share your form via email, a direct link, or on social media and ask everyone to participate.
How to Create a Blank Form
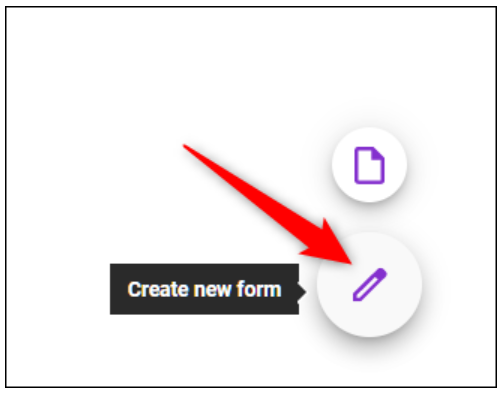
First step is to login to your Google account. Head over to the Google forms homepage and place the cursor on the multi-coloured plus sign (+) in the bottom-right corner. The plus sign turns into a purple pencil icon and then click it to create a new form.
How to Customize Your Form
One of the first things you might want to do after you create a new blank form is give it a bit of personality. Google Forms lets you customize the theme and help it stand out by adding an image, colour, and font style. Click the artist’s palette at the top of the screen. From here, you can choose a header image from one of the many stock photos provided or you can also upload one of your own, the primary colour of the form, the background colour, and font style.

After you customize your form, close the theme options to return to your survey.
How to Choose Question Types
When you create a Google Form, you can choose the types of questions you want people to answer. Whether you want static answers from a multiple-choice form or essay-length responses, you can create your ideal form.
Click the drop-down menu next to the question field. Then, select the type of question you want from the list.
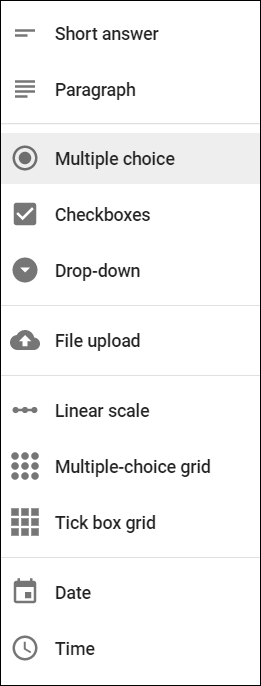
Your choices are:
- Multiple Choice: People choose between a set of options (one per question). You can include “Other” and an option so people can input a short answer.
- Short Answer: Responses only require a few words. You can set rules people have to follow in their answer. This will be great for email addresses or URLs.
- Paragraph: Responses require long-form answers of one or more paragraphs.
- Checkboxes: Responders choose one or more of a set of options, including the “Other” option for a short answer.
- Drop-down: People choose their answer from a set of options in a drop-down menu (one per question).
- File Upload: This allows the person to upload a file in response to a question. Uploaded files use Google Drive space for the survey owner. You can specify the size and type of files people can upload.
- Linear Scale: People can rate your question on a scale that starts at 0 or 1, and ends on a whole number from 2 to 10.
- Multiple Choice Grid: This creates a grid from which people can select one answer per row. Optionally, you can limit answers to one choice per column and shuffle the row order.
- Checkbox Grid: This option creates a grid from which people can select one or more answer per row. Optionally, you can limit answers to one choice per column and shuffle the row order.
- Date: Responder must choose the date as an answer to the question. The default is day, month, and year.
- Time: Responder must choose the time of day or a duration of time.
How to Add More Questions
If you’re creating a survey or quiz, you’re likely going to include more than one question on it. Google Forms makes it super-easy to add as many questions as you want, and you can vary the types of questions. You can even separate them into sections, so everything doesn’t appear on a single page.
To add more questions to your form, click the plus sign (+). It shows “Add question”.
How to Share Your Form
After you’ve completed creating a form, it’s time to send it out and get some responses. You can share the form via email, a direct link, a QR code, on your social media account, or you can embed it into your website. To get sharing, open the form you want to share, and then click “Send”. Choose how you want to share your form from the options at the top of the pane. From left to right, your choices are: email, direct link, an embedded link for your website, Facebook, and Twitter.
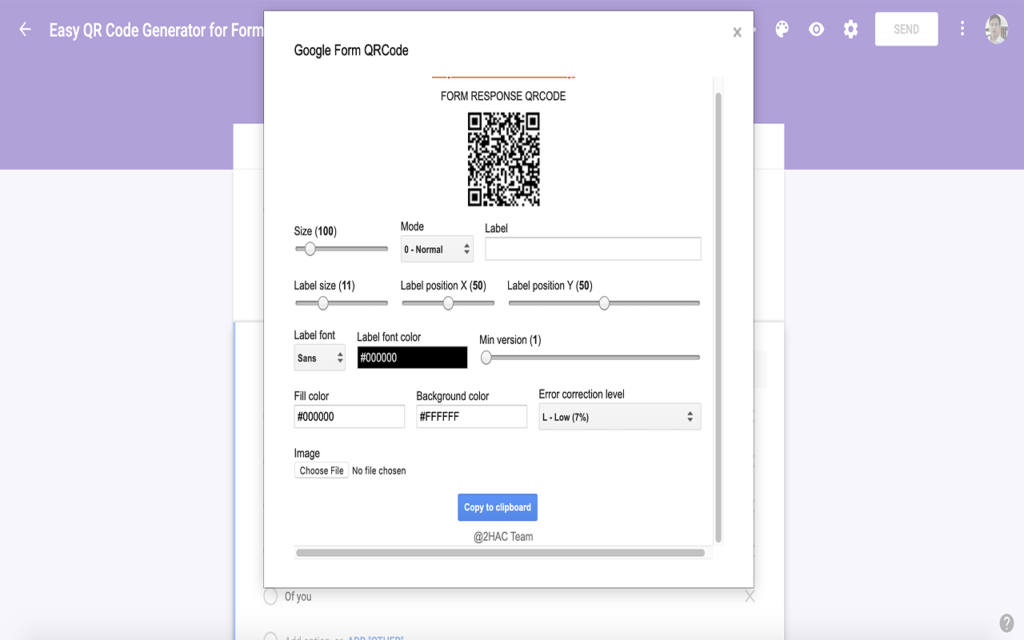
How to create QR code for Google form
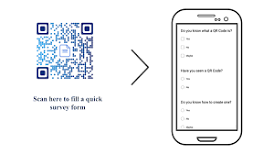
QR codes are one of the most effective ways to effectively share your Google Forms. While making the link shareable to everyone is also effective, this may not quite work for outdoor settings that may need quick and easy access to the form.
Once you’re done creating a customized Google form, copy the URL and then paste it into the best QR code generator you’ve found. Make sure you select a dynamic QR code, rather than a static one. Dynamic QR codes mean that the URL within the QR code can be edited or changed in the future. Putting in a simple way, you don’t have to generate a new QR code whenever you need to update the old URL. After a dynamic QR code is generated, save it as a photo, ready to be disseminated. However, you can customize it further to include your branding and personal touches.
Uses of QR code surveys:
Conducting market polls and surveys
A brand that doesn’t listen to its market is stagnant. That’s why businesses conduct market polls and surveys to realize what their target audience needs and wants.Instead of conducting pen-and-paper surveys, putting QR codes for Google Forms in your promotional advertisements and social media platforms may be a better option.
Getting feedback for products and services
Similarly, the QR codes for Google Forms are effective in gathering feedback about your products and also customer experience. Customers also feel valued when brand urges their feedback.
Making quizzes and tests for students
Learning has changed drastically with the pandemic. Handing out test papers in a physical classroom setting has now become digitized using QR codes on the Google Forms.