
A complete guide about ‘Guided Access’ Feature which is available on iPad.
What is Guided Access?
Guided Access is a powerful feature within the Apple ecosystem, designed to safeguard user privacy and provide control even when sharing devices with others. Imagine scenarios where you lend your iPad to your child to watch their favourite cartoon or loan it to a friend for browsing, while harbouring concerns about accidental access to sensitive information. With Guided Access, you can selectively restrict access to a single application, ensuring that only the intended content is accessible for a specified duration. By activating Guided Access, the user is confined to the designated app, preventing unauthorised access to other content. Sounds interesting, right?
In this article, we will explore how Guided Access works and guide you through the process of enabling it on your iPad.
Where can we find it & How to turn it on?
To locate Guided Access on your iPad and enable it, follow these steps:
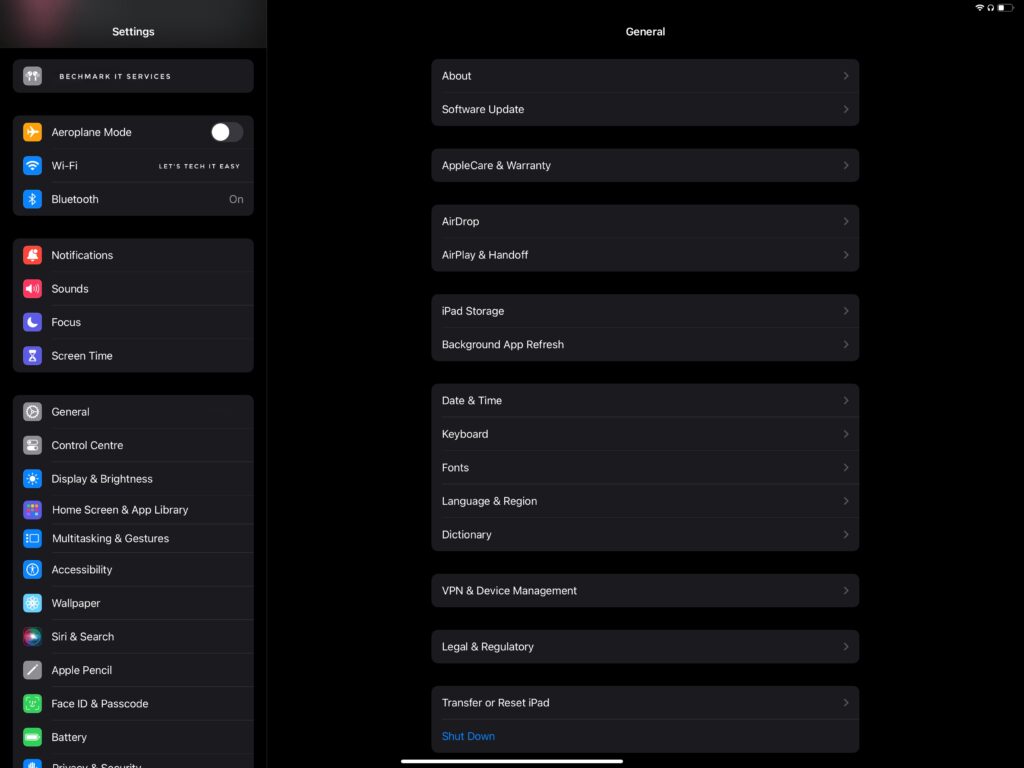
1. Open the Settings app on your iPad and scroll down and look for “Accessibility” in the list of general features.
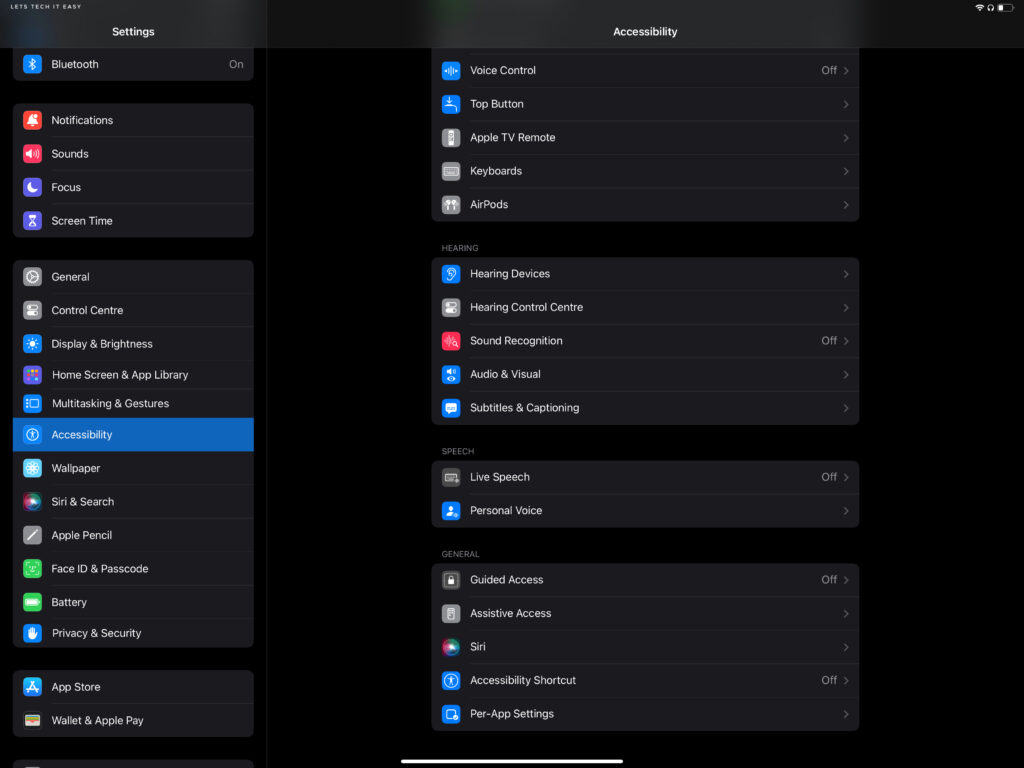
2. After finding it, within the Accessibility menu, among various features in the menu scroll down for “Guided Access”
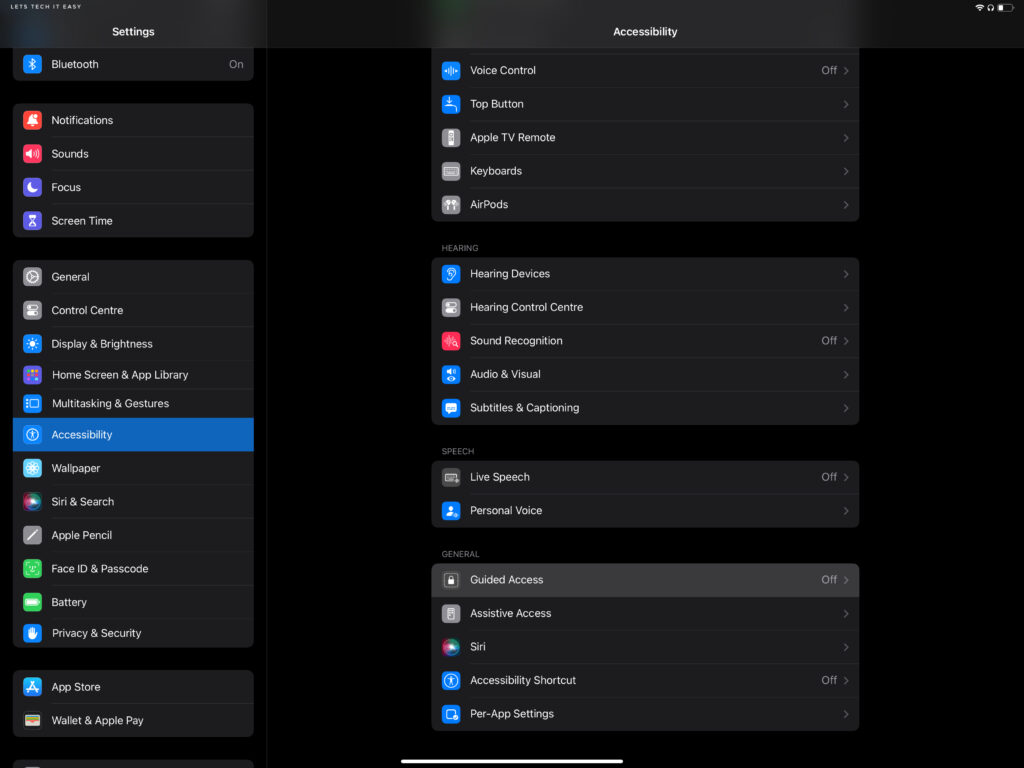
3. Post finding it, Click on Guided Access and open it.
4. After opening the Accessibility settings on your iPad, you will find the first option labeled “Guided Access.” Locate the toggle switch next to it and activate it by turning it on.
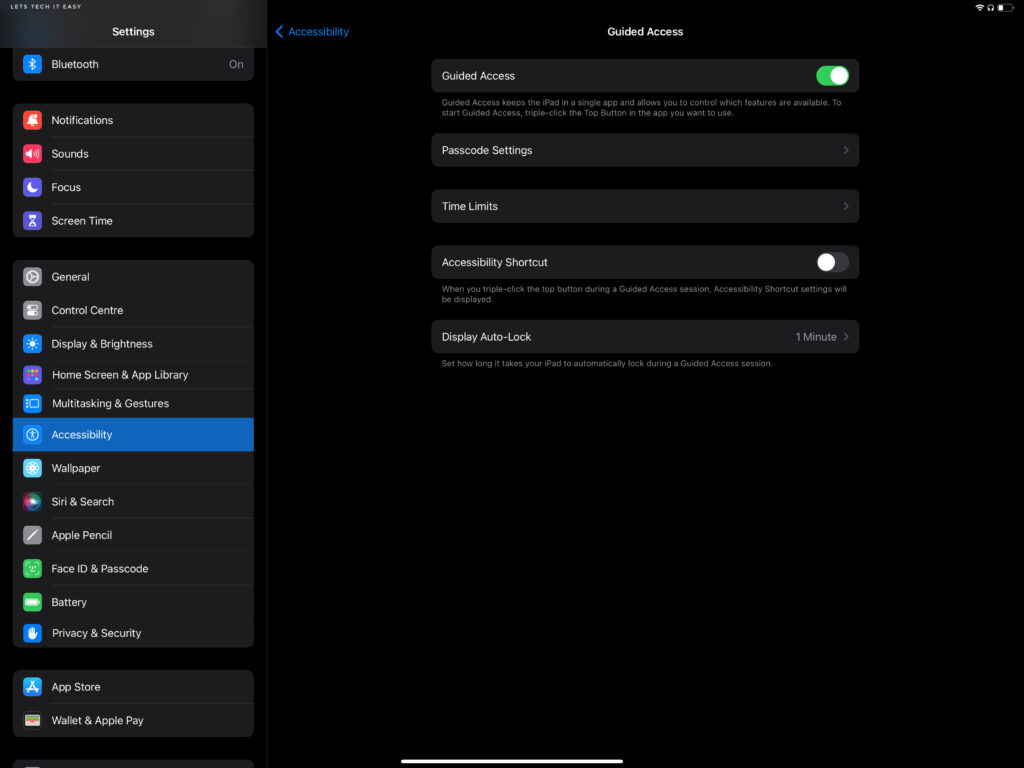
5. Now that Guided Access has been enabled, let’s take a moment to explore the additional options available within this menu. By familiarising ourselves with these settings, we can gain a comprehensive understanding of the various features offered, ensuring we make the most of Guided Access before diving into its practical usage.
Exploring Guided Access settings:
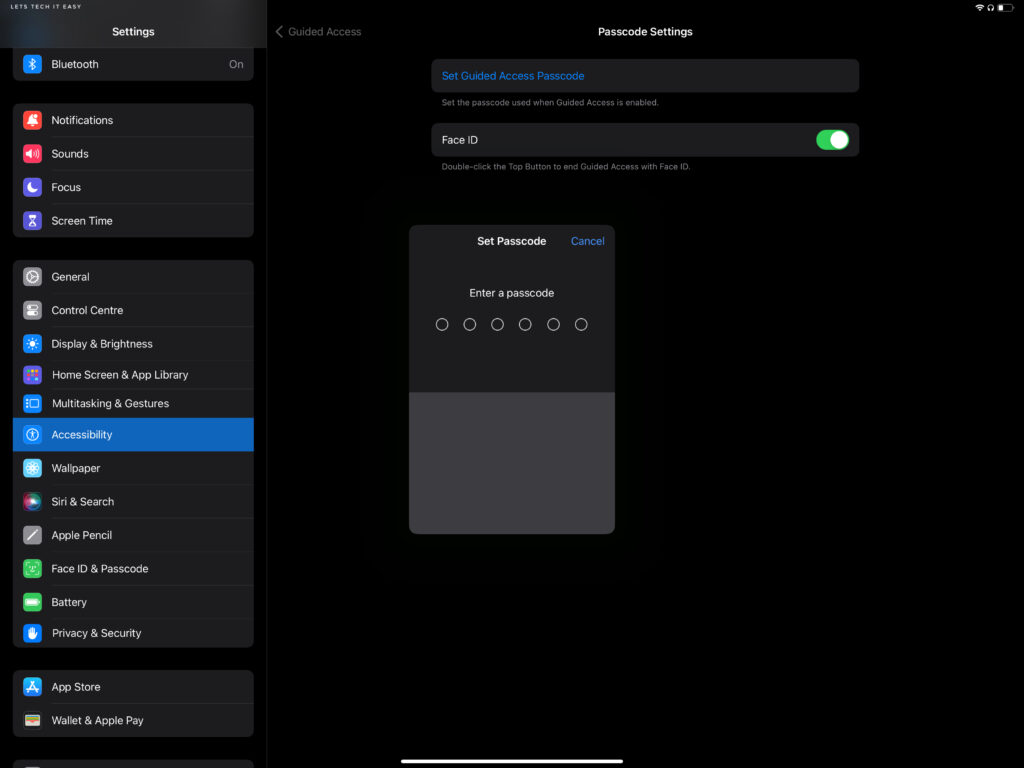
In the Passcode Settings, you can set a six-digit password for enabling or disabling Guided Access. It is recommended to use a different password from your device’s password for this specific tool. Additionally, you have the option to activate Face ID which can be used while turning off Guided Access. It allows you to use Face ID instead of entering the passcode when it is turned on.
Time Limits: In this option, you can customise the sound that will indicate when the Guided Access feature is approaching its time limit and will be automatically turned off. In the Sound section, you can choose from various short tunes, each lasting less than 2 seconds. These short tunes are useful in environments where minimal sound is preferred, such as offices or quiet settings.
Additionally, you have the ability to enable the “Speak” feature to have the remaining Guided Access time announced through audio before it ends. If you prefer silence just like me, you can choose to leave it Off.

Make sure the Accessibility Shortcut is enabled in the device settings to allow the device to activate the display of Guided Access settings upon triple-clicking the home button or lock button. This shortcut allows convenient access to Guided Access controls.
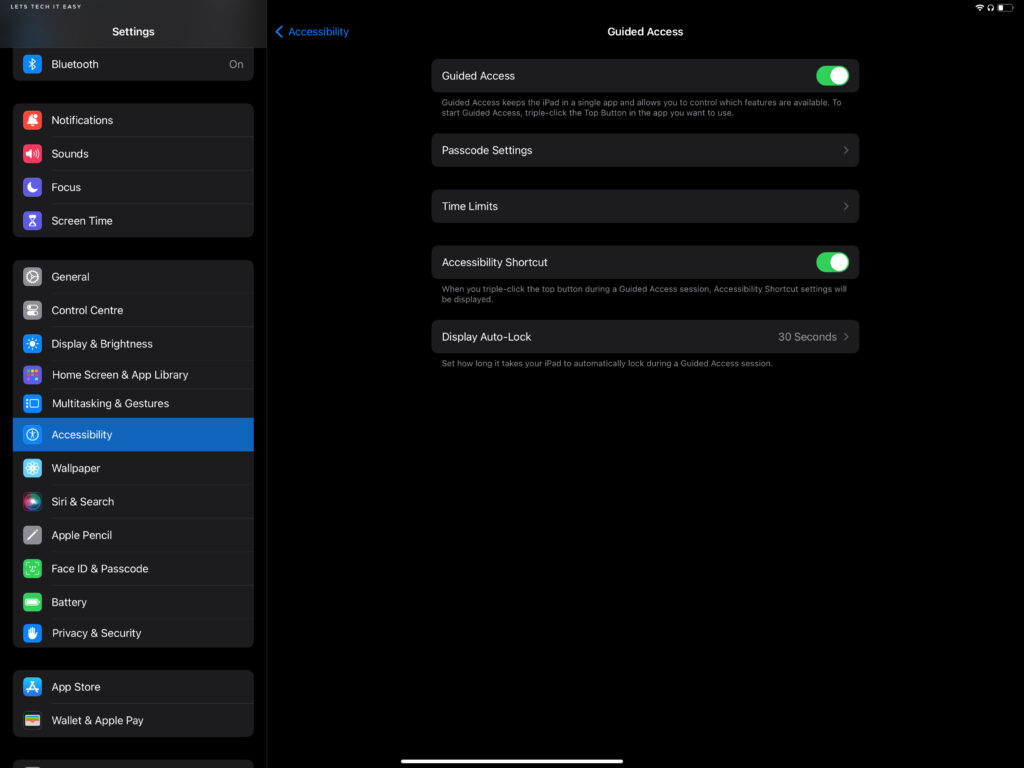
Display Auto Lock in Guided Access allows you to set a specific duration for the display to turn off when idle. It is different from your device’s auto-lock settings. Note: This feature is also different from the Guided Access end time.
How to use Guided Access and its Functions?
Now that we have turned on Guided Access in Accessibility, let’s explore how it works. As an example, I opened Safari on my iPad and accessed our company blog page. We will now see how Guided Access can be used to limit and control the functionality of Safari.

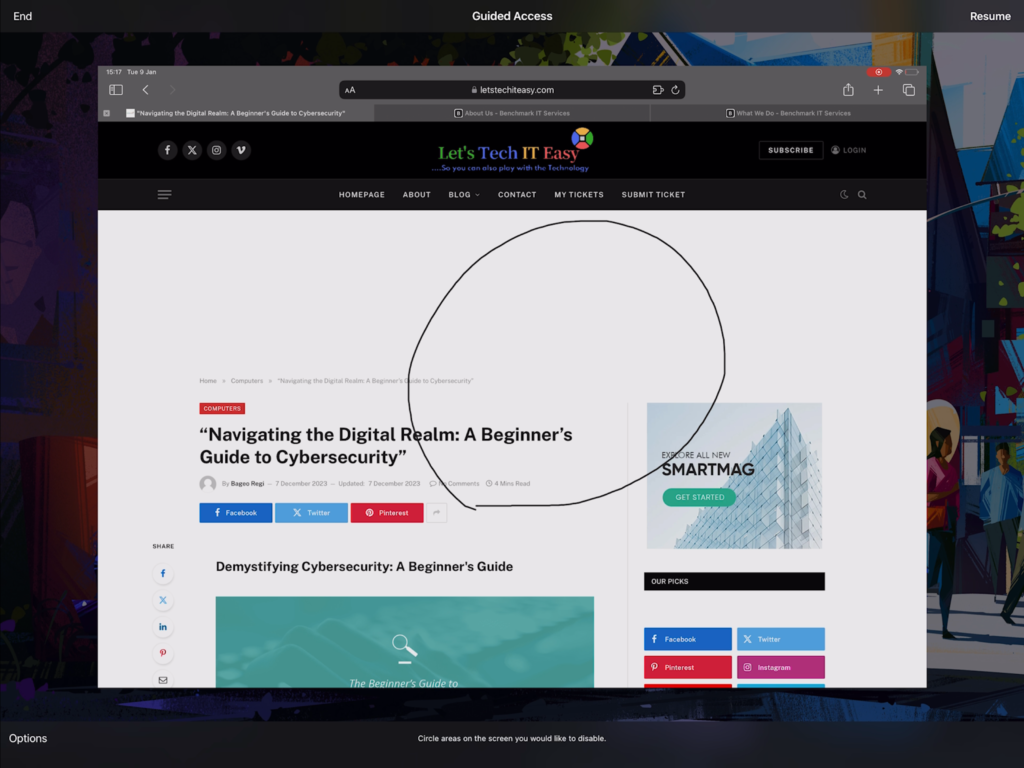
To use Guided Access, simply triple-click the lock or home button. This action will prompt the device to display the controls for Guided Access, as depicted in the accompanying image.

You will find the following buttons: Cancel (top left), Options (bottom left), and Start (top right).
Within the Options menu, you can customize the access and limitations during the enabled time period of Guided Access.
The first option Top Button allows you to enable or disable specific access to the lock button.
While the Volume Buttons gives control over the volume function. For child users, disabling volume control helps prevent accidental damage to their ears.
Other options such as Motion, Software Keyboards, Touch, and Dictionary Lookup can be adjusted according to individual preferences.
Finally, the Time Limit option, which is crucial and highly useful, allows you to specify the duration for which Guided Access will remain enabled. This feature provides essential control over the time frame during which the restrictions and limitations of Guided Access will be in effect.

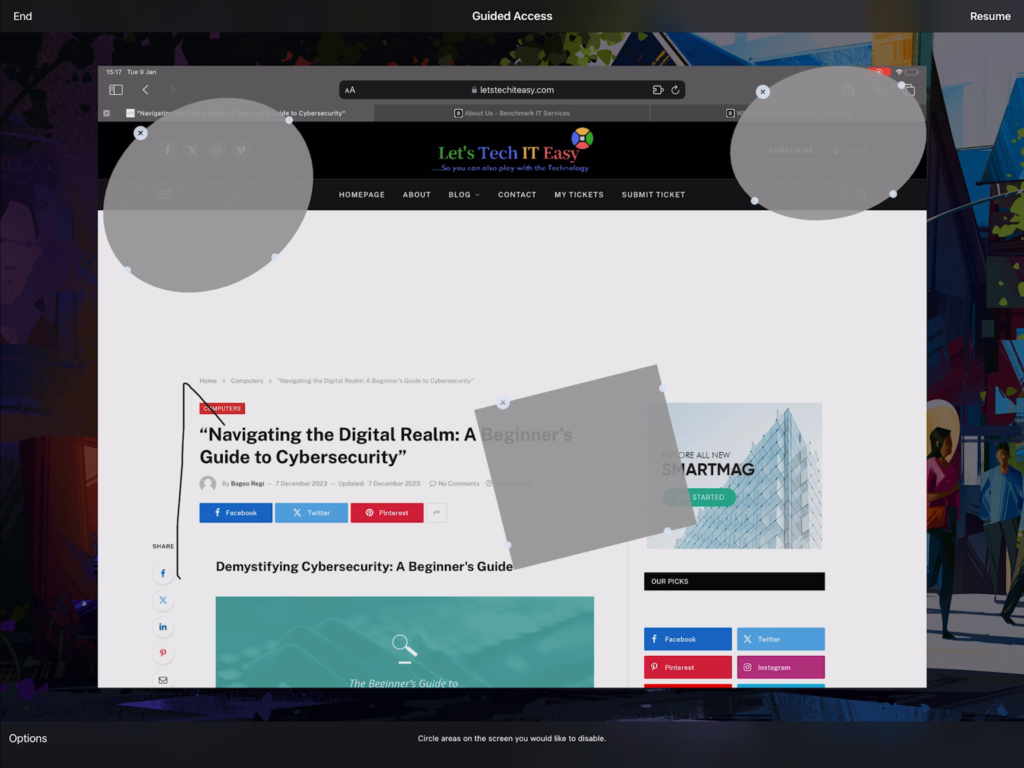
Additionally, there is a lesser-known feature that allows you to select a specific area to restrict during the designated time frame. By drawing a circle around the desired area, you can indicate to the system that you want that particular region to be non-functional. This effectively disables the designated part, providing an extra level of control and customisation within Guided Access.
You can actually add multiple shapes and select multiple areas which needs to be disabled.
Upon completing the required steps, you will find the Start option positioned at the right end corner. Selecting this option will trigger the initiation of Guided Access mode. A pop-up notification will appear on your screen, confirming that the Guided Access mode is now active. This pop-up serves as a visual confirmation of the mode being enabled.
Once activated within the specified timeframe, the functionality of your device will be restricted solely to the limited operations outlined in your instructions. No other features or applications can be accessed or utilised during this period.

Ending Guided Access mode!
To exit Guided Access Mode, triple click the home button and enter the passcode when prompted. Upon successful entry of the passcode, a pop-up message will appear, indicating that the Guided Access session has concluded.

Note or Warning: Please be aware that even after the designated end time of the Guided Access mode, the device does not automatically return to its normal state and grant unrestricted access. Instead, a pop-up message will appear, indicating that the time has expired and no further access is permitted, even to the specific applications allowed during Guided Access mode. To unlock the device from Guided Access mode, you are required to triple click the home button and enter the passcode. It is important to remember the passcode.

Incase if you have forgotten your Guided Access password, the recommended course of action is to force start your device. In most cases, this method will reset the device and restore it to normal functionality. However, if you encounter difficulties in regaining access to the regular operation of your device, or if you want to bypass the password, please do not hesitate to contact us for further assistance.